Workshop photography 101
Published 3 Aug 2024
Tags: älgen, hästen, photography
There’s an easy assumption to be made that because I’m always taking photos for this blog of the guitars I build, and because photography is another hobby of mine, then I must have lots of nice photos of the guitars I build. Alas, that’s not really the case. Whilst I enjoy photography, I mostly take photos of things I see when I’m about, and product photography is its own specialised niche of photography, and not one I’m familiar with, beyond appreciating that it is a thing in its own right. As I try to push to promote myself a bit more, this lack of photos was becoming a bit of a blocker, and so I’ve needed to do something about it.
When I started out making guitars, after I finished the second one, I got some professional photos made by (then local) photographer Mike Sim, who did a great job:
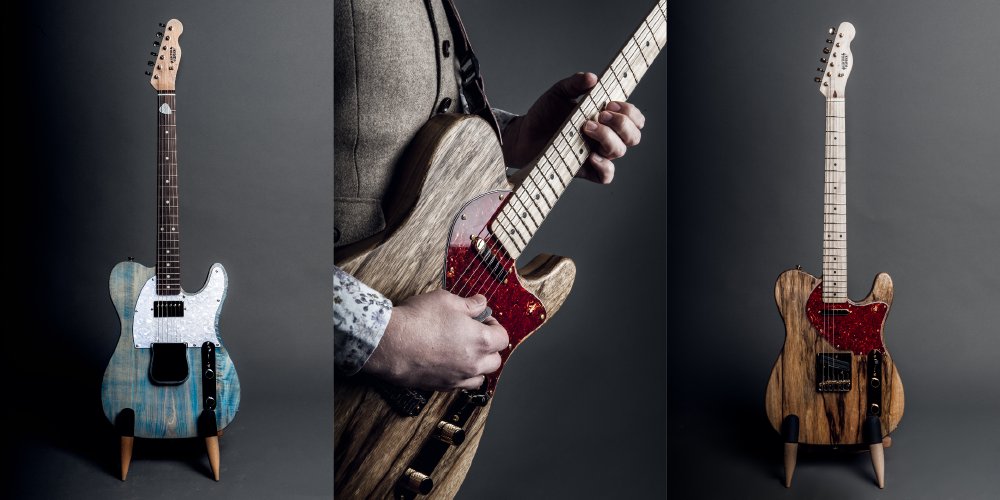
I’d loved to have worked more with Mike, getting examples of each guitar as I built them, but the cost per guitar just isn’t economical, even with a healthy discount Mike gave me for that session. As a one of occasionally, fine, but it doesn’t make sense for each build, and when I’m still at the stage where each build is pushing further than the last, that’s a limitation for me. But in general I enjoyed the experience and loved the photos, so if your circumstances allow it, I’d highly recommend working with a professional photographer if you can.
Since then I’ve generally made do with workshop snapshots where I make up for lack of quality in photos somewhat by quantity, and show more of what’s gone into each build, and hope that the story of the quality of my work sort of works its way out from this. Almost all the pictures on my build blog are taken with a phone camera.
I don’t upgrade my phone that often, so for quite a while I was using a phone that had an okay-but-not-great camera, and I tried to use my dedicated cameras instead for in-progress shots, but they just distract me too much from the building process to work for that: with a phone I can take regular snaps on any given task I’m working on without it interrupting my concentration. With a “proper” camera, that’s not the case, particularly as the workshop doesn’t have the best lighting and so I need to starting thinking about exposure and ISO, and suddenly I’m not thinking about guitars I’m thinking about photography, and that isn’t what I want in that moment. So for those I’ve stuck with my phone even when it wasn’t always the best camera I had.
And, for the longest while it hasn’t really bothered me too much, as the blog generated enough interest, and people were in the past commissioning versions of existing guitars, so they had an idea of what the instruments were like to some degree. But now I’m at the point in my career where I want to be building my own designs, things need to change, and I need to communicate a bit more the final product, as there’s a chance most people haven’t seen anything like it before.
Thus I’ve decided to put a little effort into trying to make my own product photography. Using a mix of my existing photography skills and those that I’ve picked up from watching other people do it. In particular, I was watching with interest when Andrew Meeson came to the workshop to shoot me and Älgen for Swedish television. After the interview he took some photos of me standing in the workshop with the guitar, and it was interesting to see how he lit the scenes.
So armed with a little bit of knowledge, and some very basic amateur bits of kit, I had a go at trying to make some product photos that don’t look, well, like I took them :)
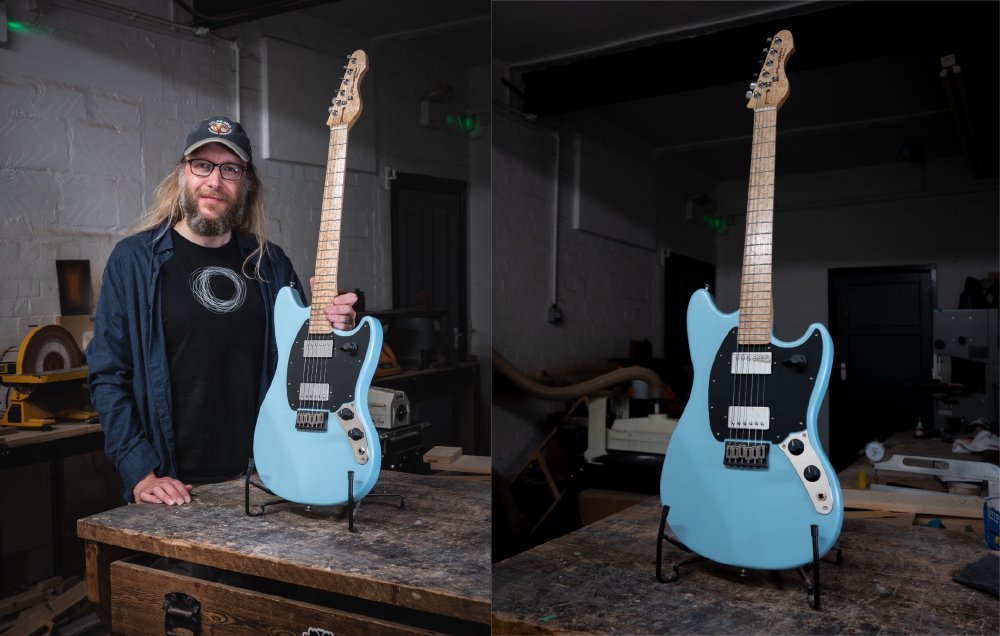
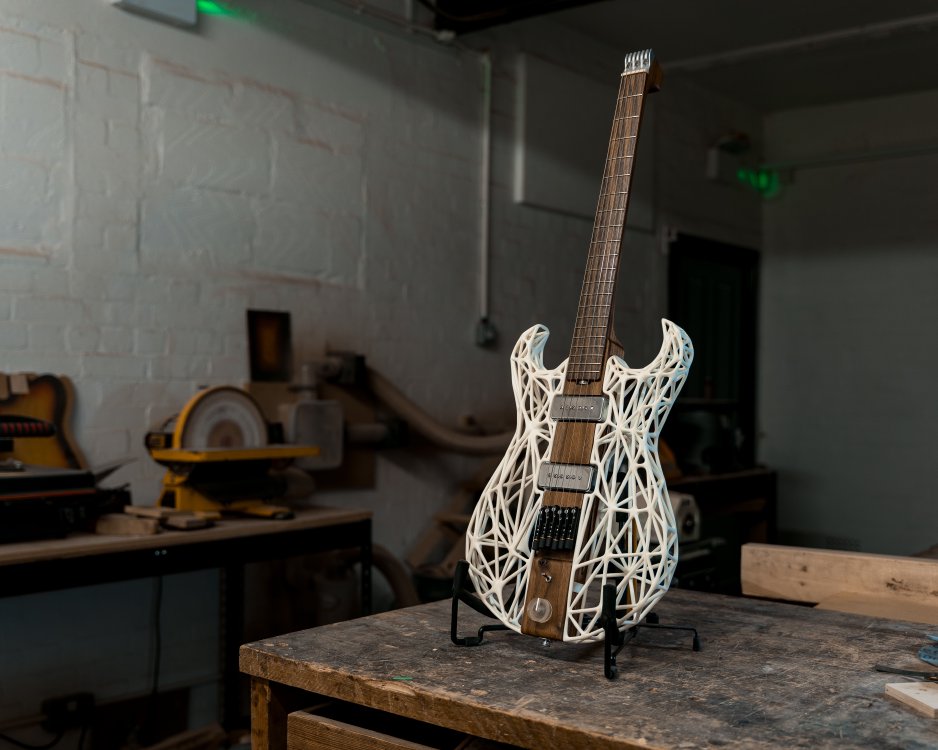
And the results are not bad for a beginner I think. Here’s some for Älgen:
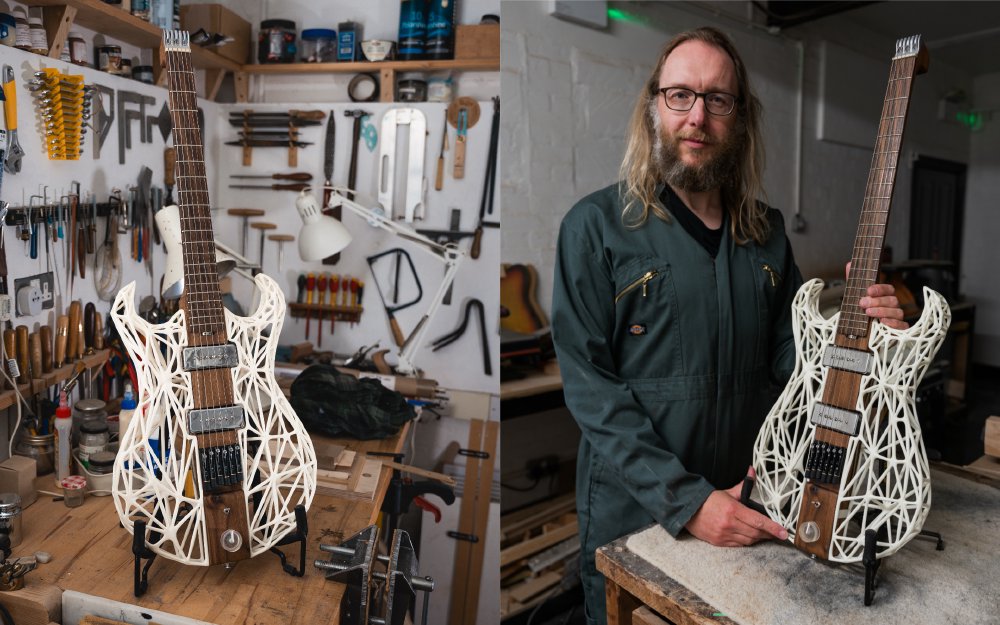
And then I had a second photo session to take some photos of the nearly completed Hästen:
Whilst they’re not quite as good as a professional would do, they’re certainly a step up from my usual photos in terms of being useful marketing material.
I have to confess, I’m not a huge fan of the dark and moody workshop look in these images, I tend to prefer bright and airy and colourful when I can. But this scene and style plays to the strengths of the limited experience and kit I have and so I’m rolling with that rather than fighting it. The wonderful thing is that the viewer doesn’t know this, so it feels like a deliberate choice rather than a limitation of sorts - they don’t know that I’ve shot things this way because it’s just what I can get away with :)
In that vein, in case it’s of use to other folk out there trying to take nice pictures of whatever they make/maintain/restore, then here’s some notes on how I got these shots.
The camera - don’t worry about this bit
You don’t need a fancy camera for this. I’m using an old mirrorless camera I got second hand that’s about ten years old, but I could also have used my phone for this and used the other tips here - I’m used to a dedicated camera for photography so went with that. If you’re using a dedicated camera the main thing I’d recommend you try to get is a zoom lens if you can, to let you more easily frame your shots without moving around much (you can crop later to achieve the same effect if not). I’m using a 24-70mm zoom lens, which is the typical “standard” zoom range (16-55 mm on APS-C cameras, like those from Fujifilm, is the same range). But the main point is that most dedicated cameras made in the last 15 years or so, and most phones in the last five years or so, will be more than good enough for this, so the chances are the camera you have will be better at this than you are - that’s certainly the case for me.
Lighting - worry about this bit
If it’s not the camera that’s holding you back, then what is it? Well, of all the tricks for product photography, I think lighting is the key one. Lighting is everything in photography, I know this from outdoors photography I tend to do for my hobby, where sun and shadow play a huge part in how a scene feels, and the biggest tip I took from watching both Mike and Andrew at work was seeing how they lit the scenes.
I general you want nice defuse light, and you also want more than one light, so that you don’t have one side lit and one side in shadow. I don’t have a budget to go fancy on lights or flashes, so I rely on using one room light as the main light, then I got a cheap LED panel as a “fill” light that acts to brighten up the shadows - it was £40 on Amazon, and the main requirement beyond cheap was that it have a tripod mount so I could put it on this old Gorilla Pod I’ve had since forever:
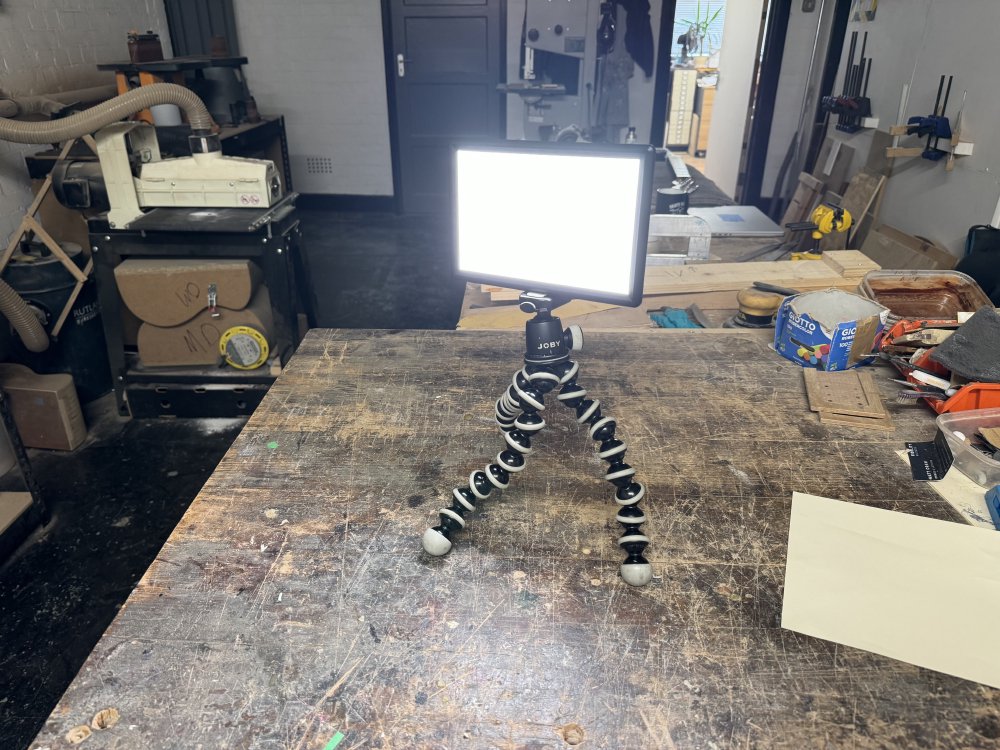
One feature that most of these seem to have that I do also recommend you look for is it has a colour balance dial. Different lights will have a different colour to them, and so using this dial I can ensure that my LED panel is making the same colour light as the primary room light I’m relying on, so that I don’t have one side of the guitar slightly yellower than the other.
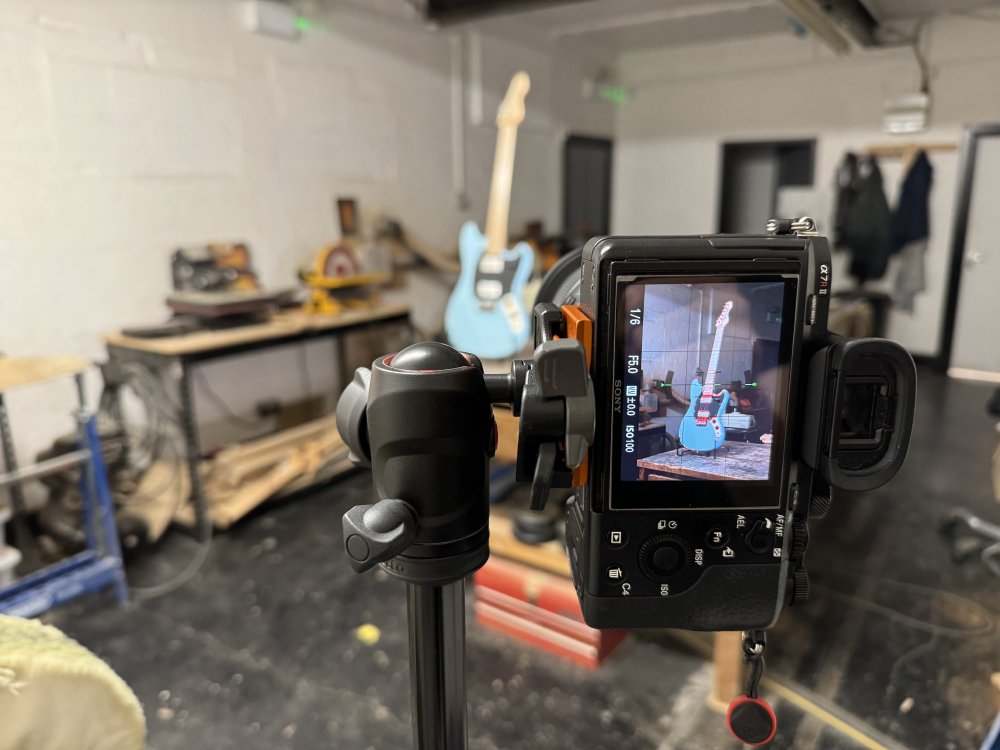
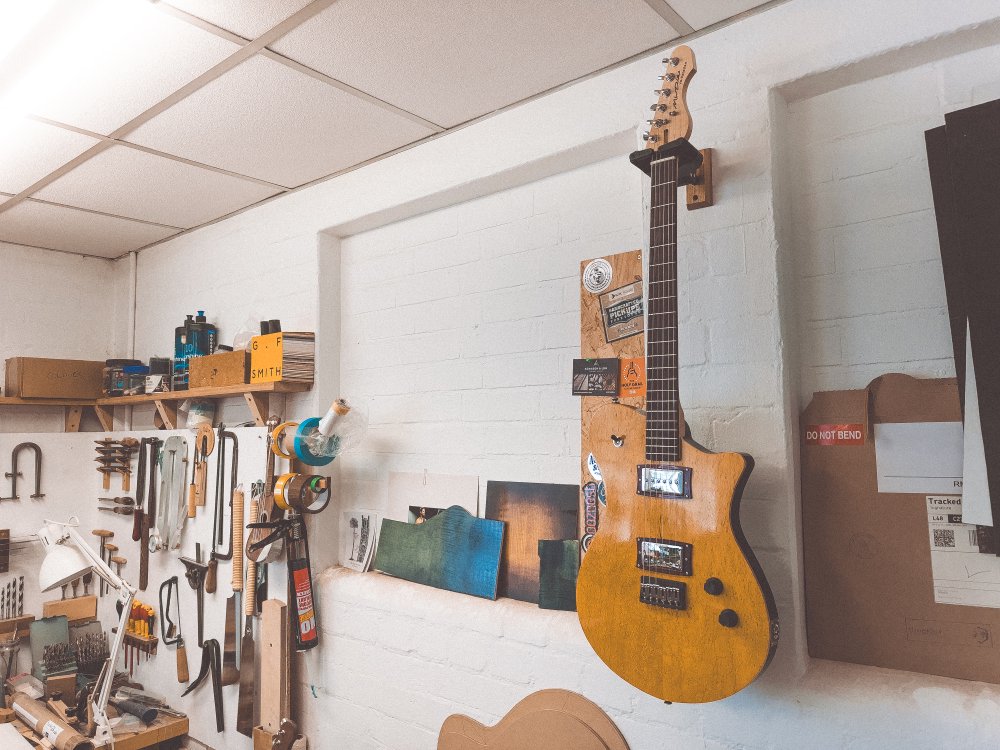
Lets make this discussion more specific. If we take this photo, and lets run through what I’m doing light wise (it isn’t that complicated, don’t worry):
There’s three lights in the workshop, and I’ve turned both the ones behind the guitar off, and left on just the one that is in front of the guitar on, and this helps make the guitar stand out in the room. But without the extra light from my LED panel, the right hand side of the guitar would be in shadow mostly, and so just off scene is the extra light, turned down so as not to be brighter than the room light, but just enough that it makes the guitar not seem so dark.
As I say, I don’t like the moody dark look, but given the lights I have to hand, this is what I can achieve, and it works well enough.
If you have a desk-lamp or other small lamp, you can even use that instead of buying an LED panel - you just want to try and diffuse the light rather than have it pointed straight at your subject, as that’ll create distracting shadows (unless that’s an effect you want - there is no truly right or wrong thing here). If it’s an LED bulb you can cover it with some paper or thin white cloth, or you can bounce it off the wall or ceiling. Similarly, if you have a flash on your camera by all means use that, but again just find a way to diffuse the light on it using a cover or bouncing it off somewhere else. The main advantage my panel has over either of these is that it has a brightness and colour tint control, but if you’re on a tighter budget you totally can make these work.
Use a tripod
Have your camera/phone on a tripod if you can; there are multiple reasons for this. But note that it doesn’t need to be an amazing tripod that costs all the money, it’s just a way to hold your camera up steady. A cheap small tripod can be put on a workbench or a pile of books or such to give you more height - you can wing it, but you want your camera to be held for you, not by you.
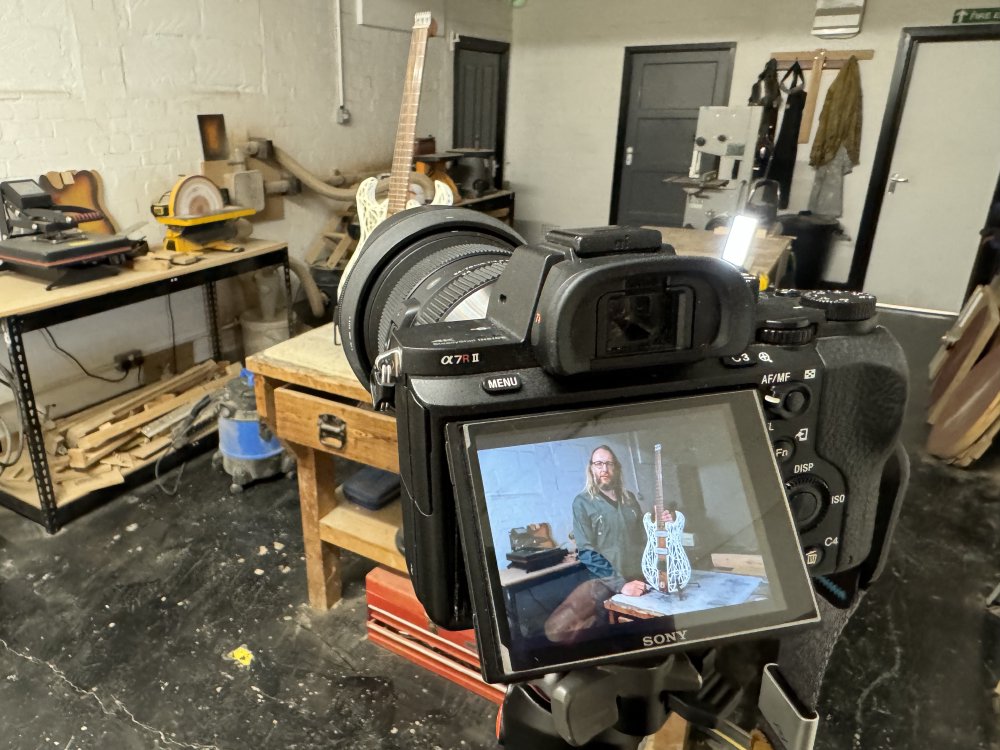
Firstly the technical reasons: in the above moody workshop shots the light is too low to let me shoot at the base ISO setting on my camera without getting a blurry photo. What is base ISO? Most camera sensors need a certain amount of light to get a clear photo in a certain amount of time. The “ISO” on a digital camera is like volume on an amplifier - if there’s not enough light you can “amplify” digitally what’s there, but that tends to add noise (like cranking your amp), so for shots like this you want to avoid it. If you can’t raise the ISO then, the other way then to get more light is to let the camera gather more photons with a longer exposure, but at this point if you shake the camera it’ll be noticeable (you can see in the photo of my camera above it is at 1/6th of a second exposure, which is too long to hand hold without blurring). So in order for me to get a noise-free photo without blur, I needed a tripod to hold the camera still. Even if your camera or phone doesn’t show you ISO settings, in low light you want your camera steady is still a good general rule.
If you have lots of light there’s still another reason to have a tripod if you’re doing this on your own: you might want to be in the frame with your product, and that makes it hard to take the photo unless you have a tripod to hold it for you. I don’t like being in the photos, but I do know that people react better to pictures of the guitars when I’m in the frame with them - I guess it gives it a more personal touch with the maker. I wish it wasn’t the case, but any blog posts or youtube videos I make where I’m in the photo I tend to get a larger number of folk react to them, and so begrudgingly I know it’s helpful to have some photos with me in the shot.
Finally, it helps with composition and framing. Getting the composition of a photo good takes work, and working out that composition is easier when you can change one thing at a time as you hone in on the shot you want. Imagine you’re setting up a scene of with your product in it, you line it up, and it’s okay, but perhaps the product would look better just a little to the left, or the fill light needs to be a little brighter. So you walk over, make the adjustment and walk back. If you’re hand holding the camera you’re unlikely to get the composition perfectly back where it was, and so now you’ve changed two things, and so you don’t know if the improvement/worsening composition is down to the change you just made in the scene or that you’re now in a slightly different position. With a tripod you can be more precise about the setup and more quickly get to where you’re happy.
Pay attention to what else is in your scene
Speaking of composition, one of the best general tips I have for any photography is to be aware of everything in frame that isn’t what you’re interested in, as that’s what’ll bug you about a photo later. To me this is what separates someone taking snapshots and someone taking photos: you need to care about the whole image, not just the thing you’re interested in. As humans we’re good at focussing our attention on the thing we’re interested in, say photographing this guitar. But it’s then when you get to editing the photos later you realise you left some rubbish in the background or off to the side, or your cup of tea is there in the shot, etc.
One easy way to do this is to use a solid colour sheet of paper or fabric as a backdrop, as Mike did in that original photo session which we shot in his studio. With this all you have in the scene is your subject and nothing else. This is great for certain products, but for me the workshop is part of the story of a custom guitar, which is why I’ve not gone that route. But I have done it in the past for smaller items for fun, and for that I just bought two A0 sheets of white card from an art store, one for under and one for behind, and for a few quid I was good to go. Or you can get small fabric light boxes on amazon for not much these days.
However, if you’re like me wanting to get the context of your build in the frame, try to think about everything around the thing your photographing, and whether you can remove things from the frame if they don’t belong. Sometimes you can’t, and in that case can you either recompose your scene to cut it out, or can you use depth of field effects to ensure your background is blurred out enough to hide it.
You can also use photo editing tools to help save you, but I find it generally easier to remove things before hand rather than afterwards. Sometimes though it can help you save an image, like this one where I failed to spot that the name and address of one of my workshop colleagues was on a large envelope behind the guitar, as I was so focussed on the guitar and tools, I missed it at the time.
Once I’ve called it out, it looks a bit odd that I edited it out, so it would have been better had I spotted before hand, but thankfully most people don’t notice this if not prompted.
Practice
Beyond that its just like anything: practice. As a hobby photographer my rule of thumb is that I’m happy if a few photos in a hundred are worth publishing, that’s a really good result. That ratio will get better the more you do it and the more you learn what doesn’t work for you and you can anticipate it before you take the photo. For these sessions I was about one in ten or fifteen was worth keeping: most were just not as good as I had imagined they’d be when on the computer, or I got my focus slightly off, or I forgot to move something out the frame, etc.
Hopefully then this might help you get started, or help you decide actually it’s worth getting a professional to help you with marketing photos.