Workshop notes
Published 15 Aug 2025
Continuing on from last update, these “weeknotes” (ahem) follow the new neck I’m building for the second guitar I built. When I started writing about this neck in my notes here I couldn’t say what it was for, as it was a surprise present for my brother, who is the owner of that guitar. I knew he was bringing the guitar back to me as there was a problem with the electronics, and that seemed as good a time as any to finish the job I started in 2017 when I first made that guitar by building it a neck myself, to replace the one I had bought at the time.
Inspection and cleaning
It was nice to see the guitar again when my brother brought it down to me when my siblings visited earlier this year:

It’s a lovely, albeit heavy, guitar. And it’s an example about why doing commissions is fun, as it’s not a guitar I’d have built for myself: the pickups are not my style, I’m not into gold hardware and so forth. But because Tristan asked for that, I was pushed into new things: I had to replace the metal cap on the neck pickup as I couldn’t get a stacked-humbucker in that style with a gold cap, I was forced to do the fretwork myself as buying a fretted neck with gold fret-wire in it much more expensive. I learned a lot on this instrument, and so despite it not being to my taste, I still am somewhat fond of the guitar for what I learned when building it.
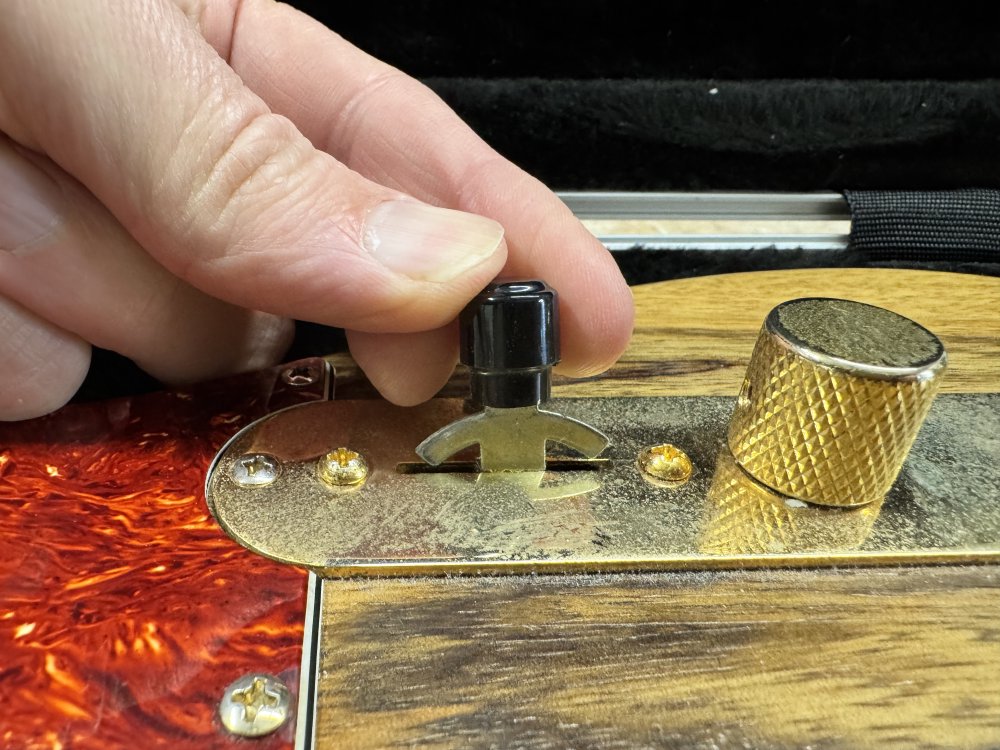
Anyway, as my brother is an actual band playing musician, I could see that this guitar had seen some action since I first built it - though it was less worn that I’d expected, with the oil finish still in good condition. That said, two things caught my attention. Firstly, at some point indeed the pickup selector switch had broken and needed replacing (an easy enough job):
And second, it was in need of a good clean after many stage outings and rehearsal sessions. This is a problem with guitars: they pick up a lot of dust and dirt adn grime and they have lots of hard to clean pieces. So I disassembled the whole thing and gave it a good clean.
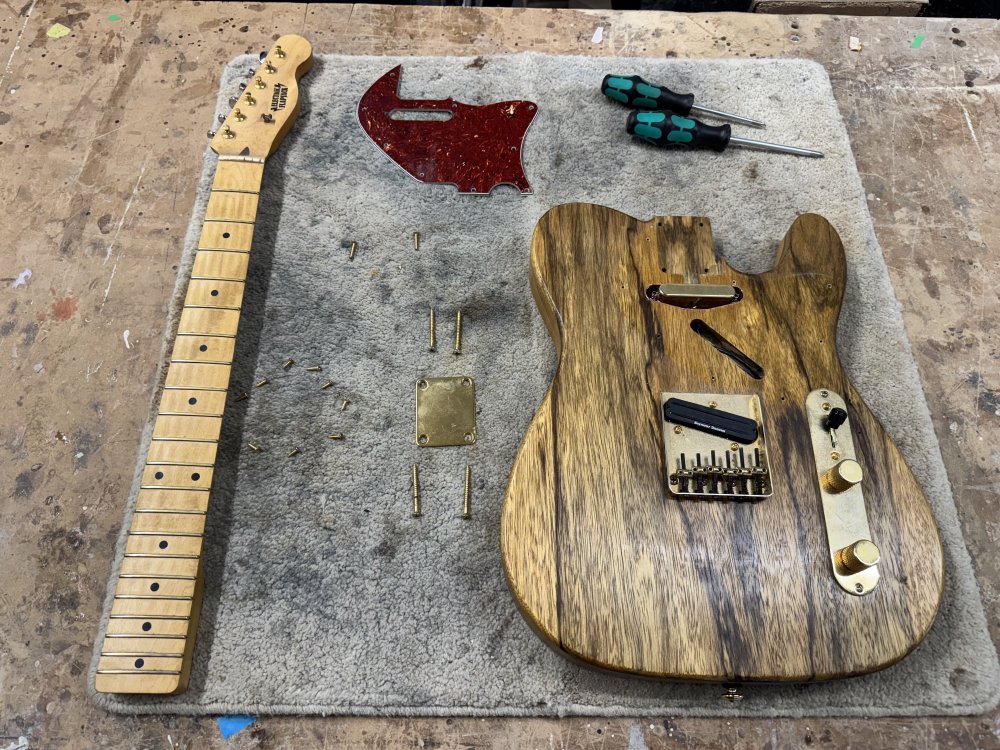
In the end even the bridge had to come off to let me get dirt that had build up under the rounded edges and under the saddles. Guitar building is a glamorous life - you get to remove other people’s finger dirt from fretboards…
Radiusing the old school way
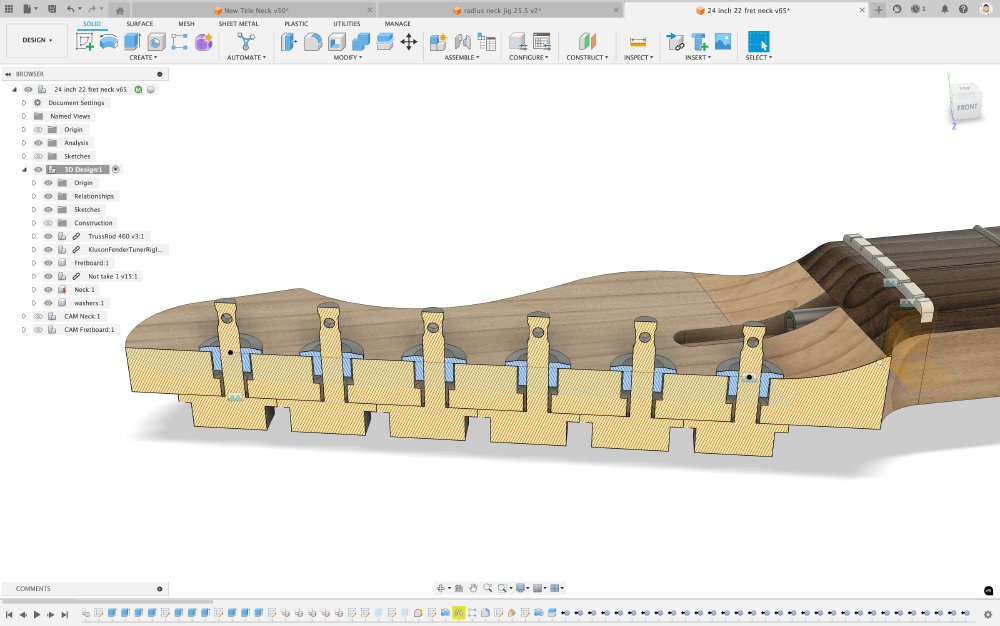
So back to the new neck for this guitar. On the last batch of guitar necks I’d built, I stepped away from using radius-sanding blocks for putting the radius into the fretboard, and switched to using a router. You can see a picture from that earlier post below, and there’s also a video on that post if you want to see it in action.
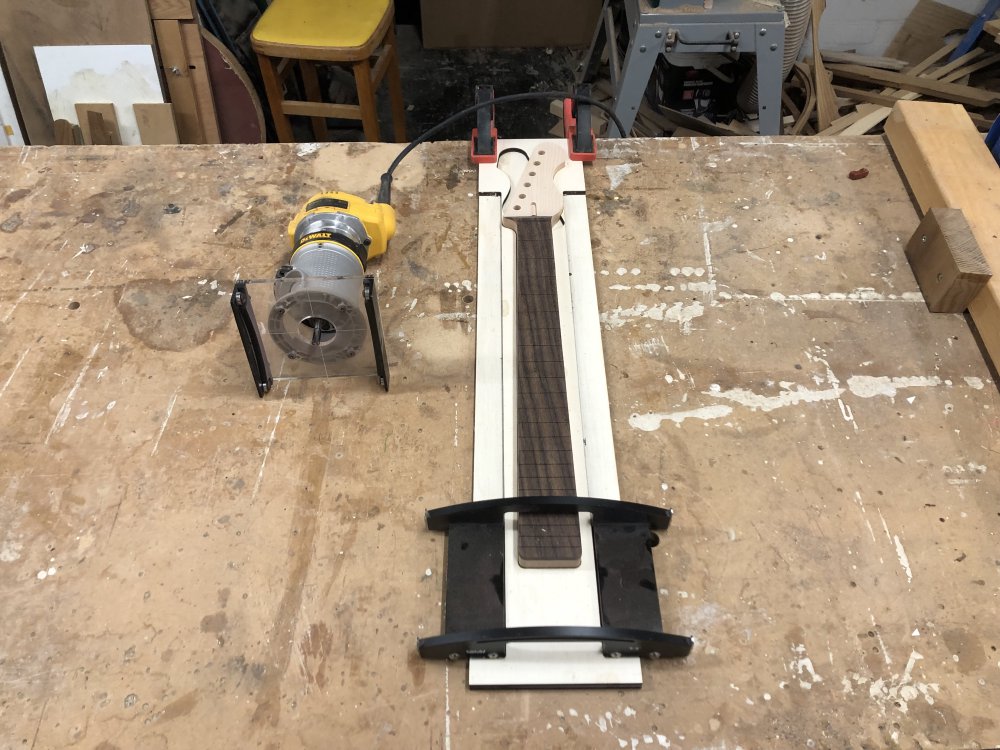
Using a router is such a better way to put the radius onto neck: like we discussed in the last post with the table-saw method of cutting the fret-slots, it’s both more accurate and faster, a total win-win, and something I don’t really want to give up compared to my old method. However…
The jig you see above I used before was made for the shorter 24" scale-length necks on builds like Delfinen, and so I needed to make a new jig for the longer 25.5" scale-length neck for The Chuncaster. However, when I fired up the CAD model to draw up the new jig I discovered that the headstock on the longer necks is slightly wider (the 24" neck is on the left, the 25.5" neck is on the right):
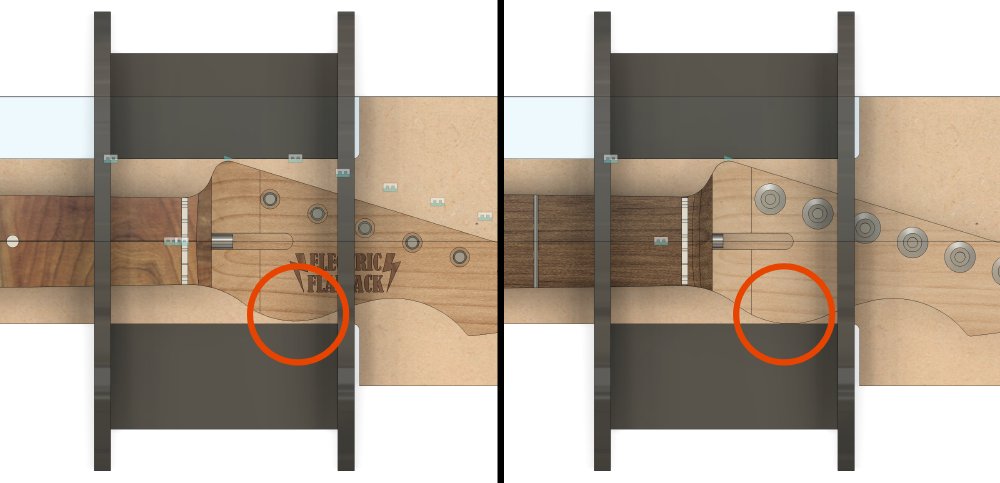
This wasn’t a particularly deliberate change, I suspect I just tweaked the bezier curve slightly when having to update the CAD model from one scale length to another without realising it. Whilst it looks like in CAD I’d get away with it just if I built the jig on the right, I doubt I’d get away with it in practice; when I made the jig for the 24" necks it actually split at the narrow point there, so I think I’d end up fouling on the headstock with the router jig.
I can claim, truthfully, that this is because I designed the 25.5" neck before I changed methods for radiusing, and so isn’t an oversight or mistake on my behalf. But there isn’t really an excuse for not having gone back and updating my 25.5" neck template to accommodate using the router for radiusing the fretboard I started making this neck, that’s just lack of foresight on my behalf, and that I didn’t realise I’d tweaked the headstock profile in this way.
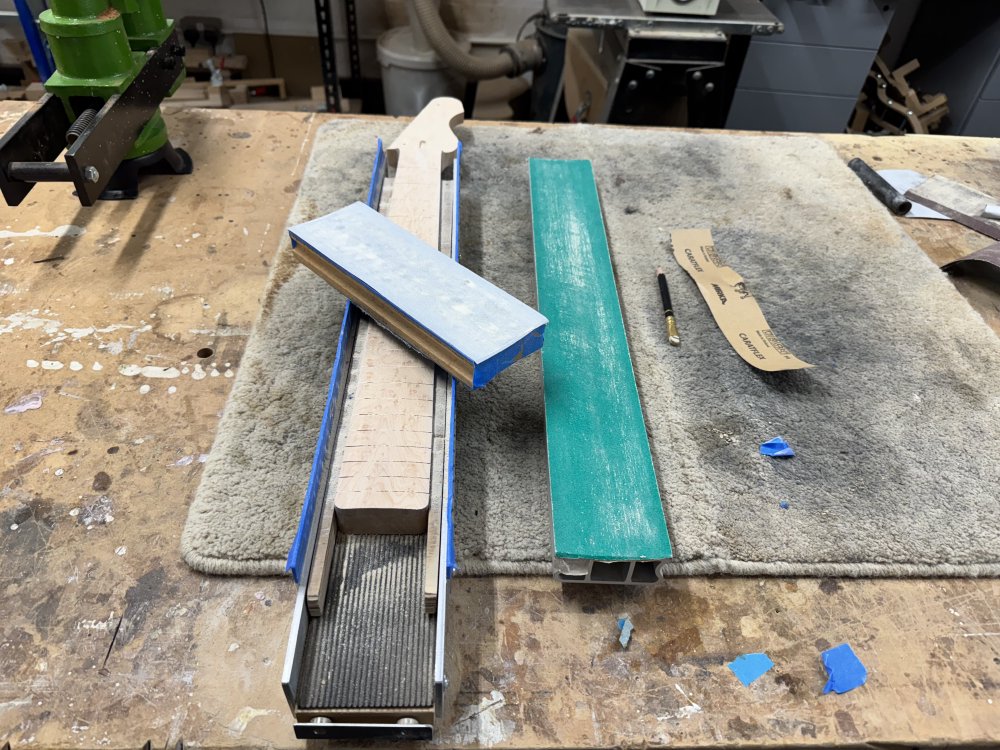
The upshot of this meant I had to go back to putting the fretboard radius on how I used to do it before I had access to fancy power-tools and jigs, and broke out my old radius sanding blocks.
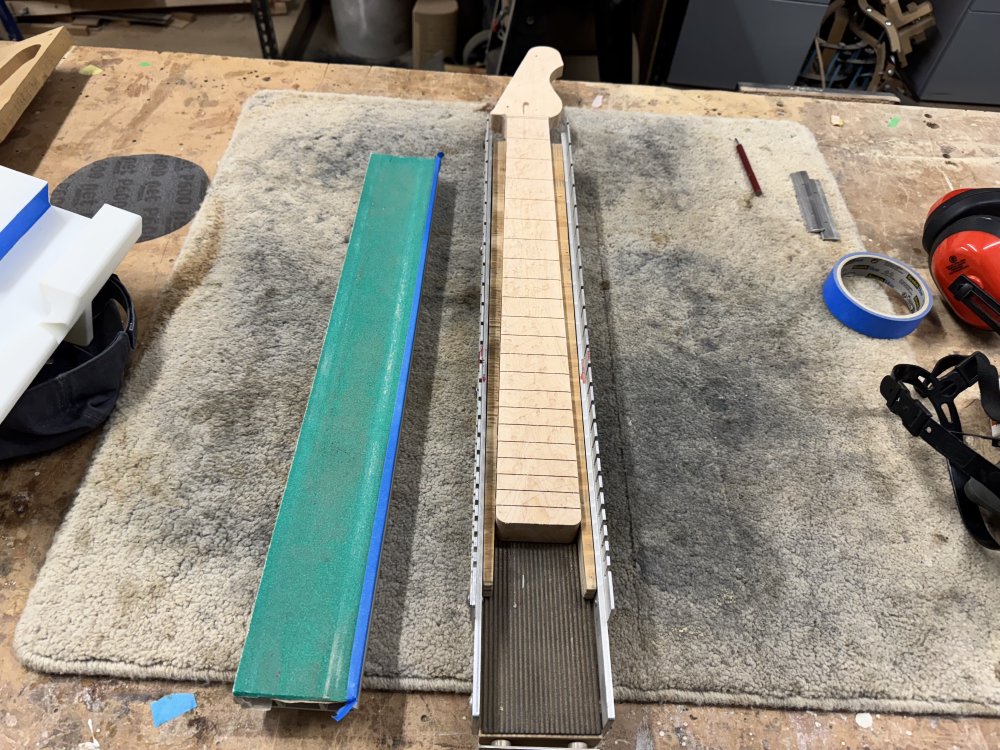
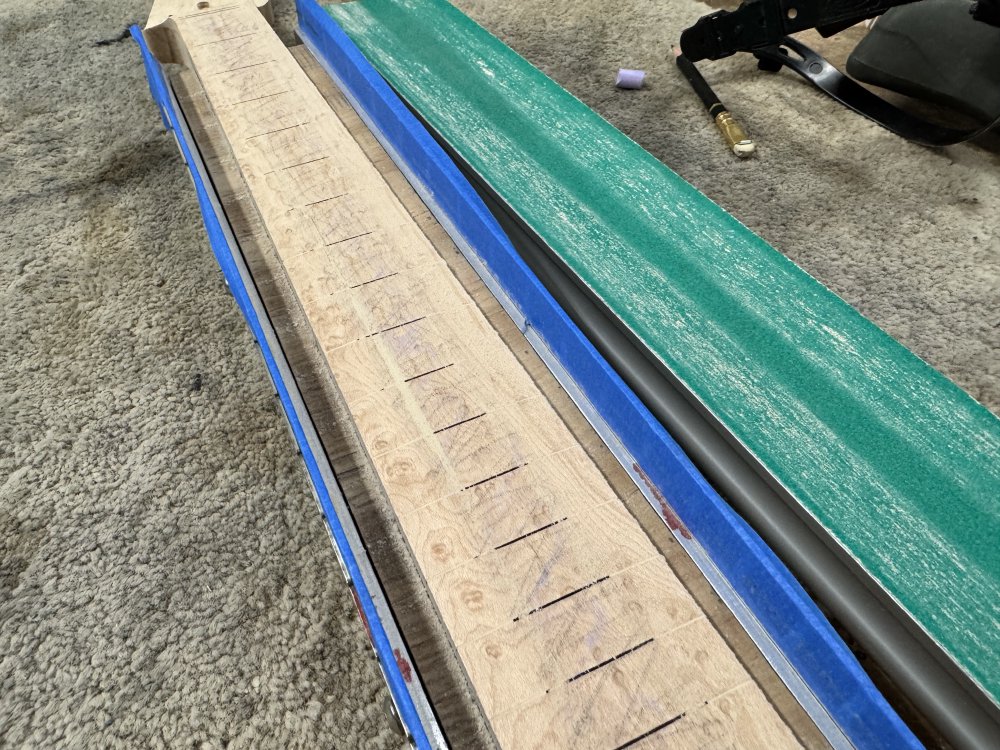
You’ll see here that I’m using some sort of jig to hold the neck and give me a straight reference parallel to the centreline of the neck. This is actually a fret-slot cutting jig that was in the workshop before the table-saw setup we saw last week was built (or perhaps why the table-saw setup was built). I’m using it to keep one side of the radius block along a straight edge parallel to the centreline because if you don’t, as a result of how your body rotates as you reach, you always end up putting a slight bias into the radius making it lower on one set of diagonally opposite corners than the other. Even with the jig you have to be careful: you can see here in this next photo what I’m talking about, as if you look at the dust you can see I’ve sanded less in the top left and the bottom right than I have in the opposite corners:
To combat this I switch sides I push the block against and what hand I’m leading with when pushing the block regularly to even out any bias over time, and checking regularly to spot if I am introducing any bias by looking end on.
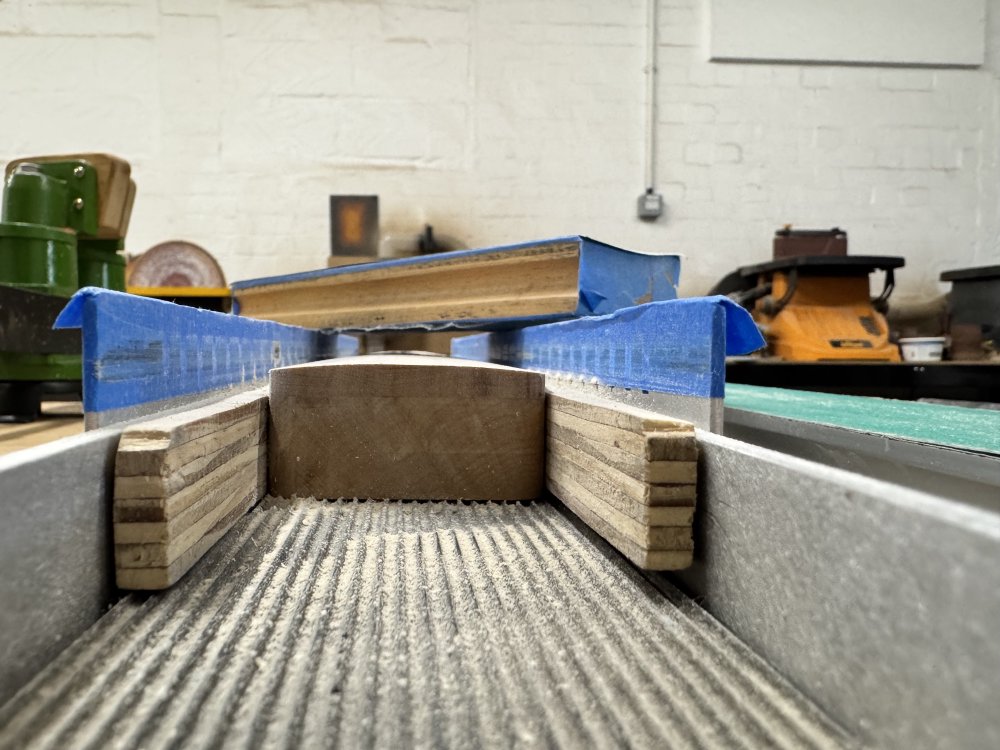
Not only is sanding the radius onto the fretboard a lot more fraught in this way than using the router, but it’s also a lot more of a workout. But after an hour (according to the timestamps on the photos) I was done:
Next time I’ll make sure I tweak my headstock design to accommodate the radiusing jig!
New-school holes for old-school tuners
On most of the early guitars I built I used vintage-style tuners, which I really like, both from an aesthetic point of view and I find them easier to string up a guitar with. However, whilst I find easier to use as a player, they presented a challenge for me as a guitar builder when I stepped away from using the CNC-router to build necks, because they require a stepped hole in the headstock to properly centre and support them. You can see here in the CAD model for one of the earlier necks I made:
The tuner-post is quite narrow, and so the lower hole is cut to that diameter, I assume to make them easier to centre, and then the metal plug that goes into the top of the hole that the post passes through requires a wider top section to fit in. The stepped hole is easy to make when you’re CNC-routing your neck, but when I switched to making things without CNC-routing I decided that this stepped hole was not a thing I felt confident making by hand, so I switched to using modern-style tuners, where you drill a single 10mm hole through and more of the tuner sits in the hole to make sure it’s placed correctly and securely. (I’d show you a CAD model of that, but I’ve never made one, as visually the new and old methods look the same on the outside, and given I’m not CNC-routing I’ve had no need to specify it in such detail - I’m a little lazy with my CAD like that :)
The point of this is that Tristan’s guitars has the vintage-style tuners on, which he likes, and so I need to work out how I’m going to hand-build the holes for them to fit into. I was pondering how I might do this when workshop-mate Matt said he’d had success using vintage-style tuners with just straight through holes - so long as the holes are aligned right you just need the plugs on the front for centring them, so it all works out okay. Which makes sense, but I needed the confidence of someone else to make it okay for me to feel I could try that!
Despite the impression I gave earlier about lacking foresight, occasionally I can think ahead, as demonstrated in the photo below. You can see there are two small screw holes in the headstock that are where the outer two tuners will need to be positioned: these are not there by accident! I use screws to mount the initial template to the plank of maple that becomes the neck, and I have two of those screws line up with the centre of the outer tuners to make it easy for me to find the reference for them even after I’ve removed the face of the headstock. I can then connect them with a line and add the marks for the four other holes to give me the references I need to drill the holes.
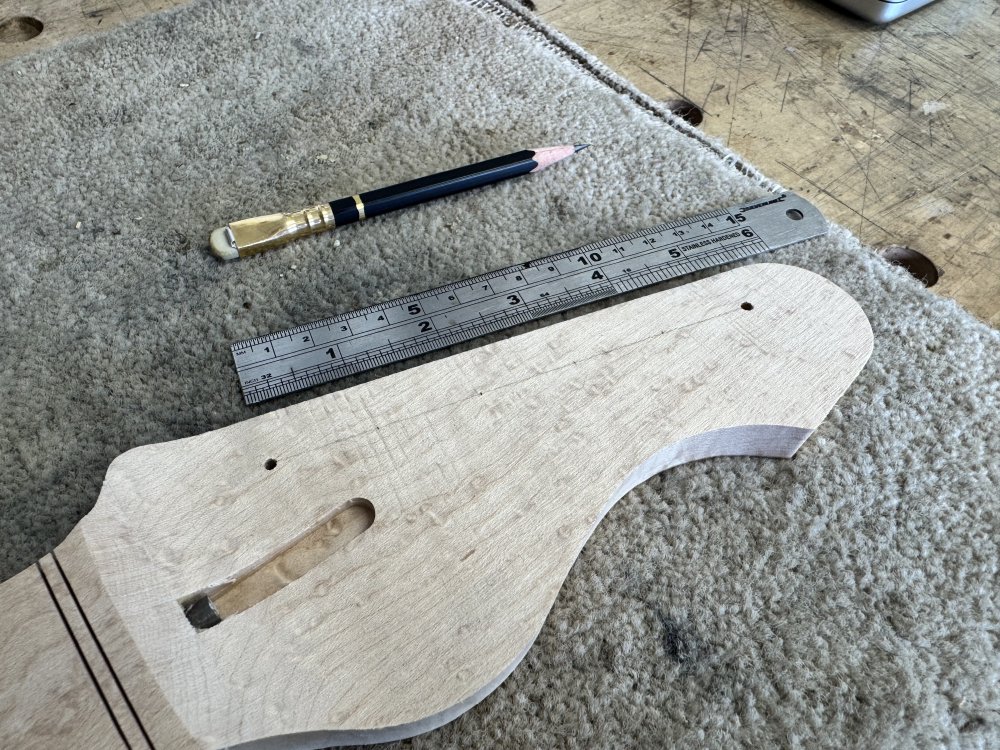
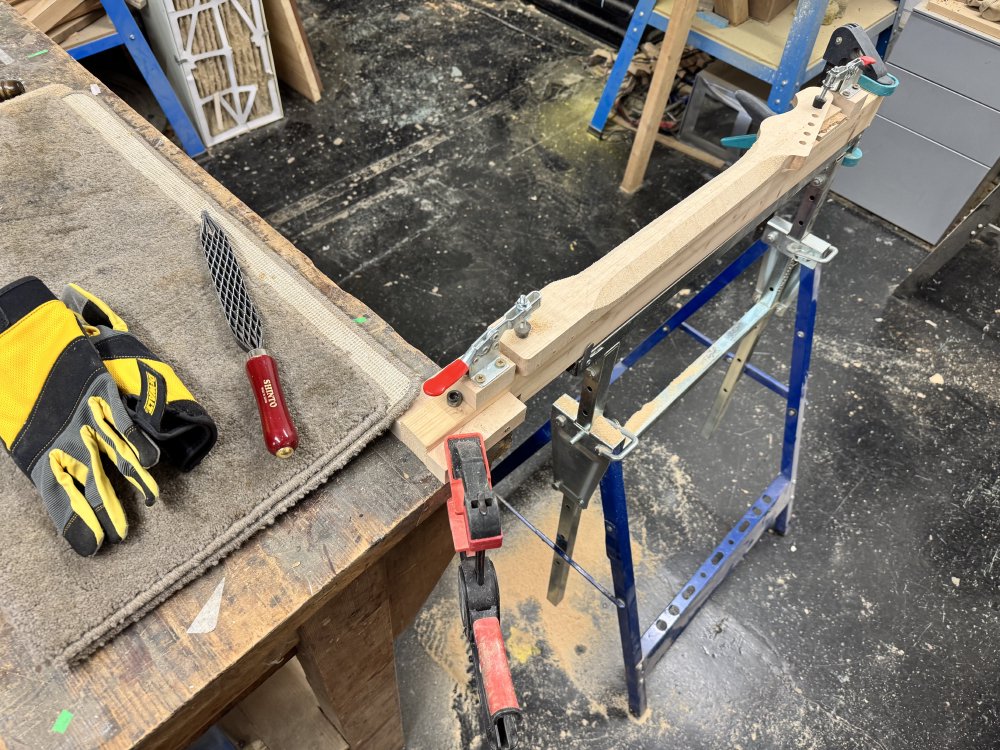
With the holes marked up, it’s then over to the pillar-drill and using a 9mm forstner bit that I had to buy for this purpose (my others are all multiples of 5mm), 6 new holes are produced:
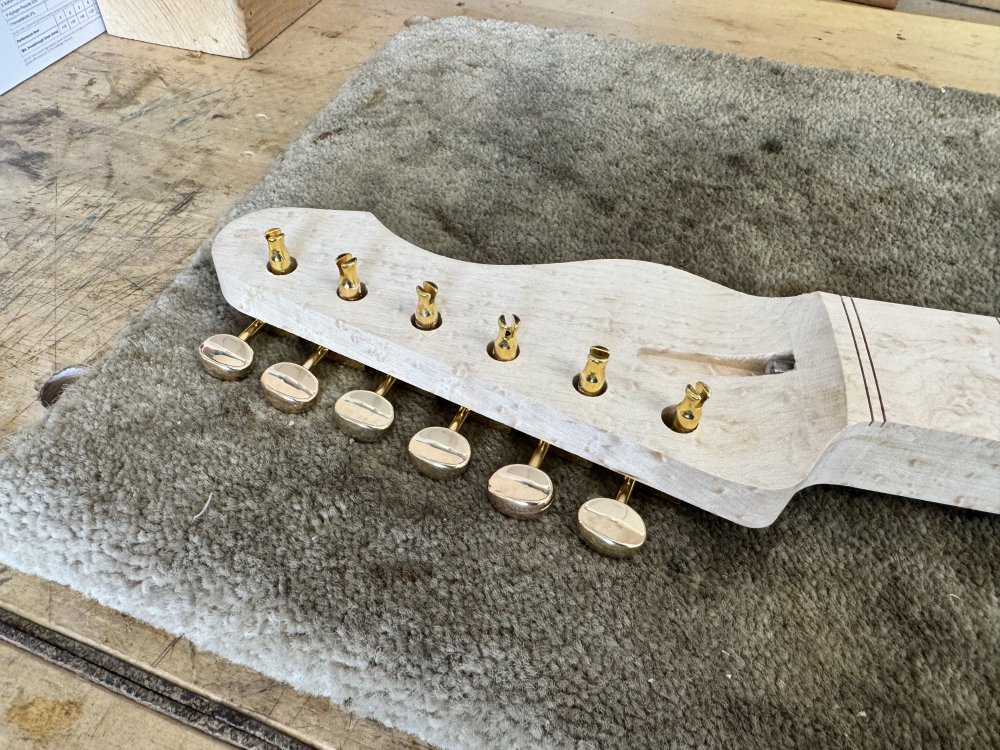
In that photo tuners are not perfectly lined up there because they’re not attached properly, and the hole being uniformly wide means they’re not locked into place the way a stepped hole would be, but once everything is tightened down they’ll be fine. It’s worth noting that the 9mm hole is fractionally too small for the inserts that go on the top, but I can use a reamer to widen them slightly when I get to final assembly.
Now for a proper workout
In last week’s post I had this photo, which shows how I mark up the neck ready for carving:
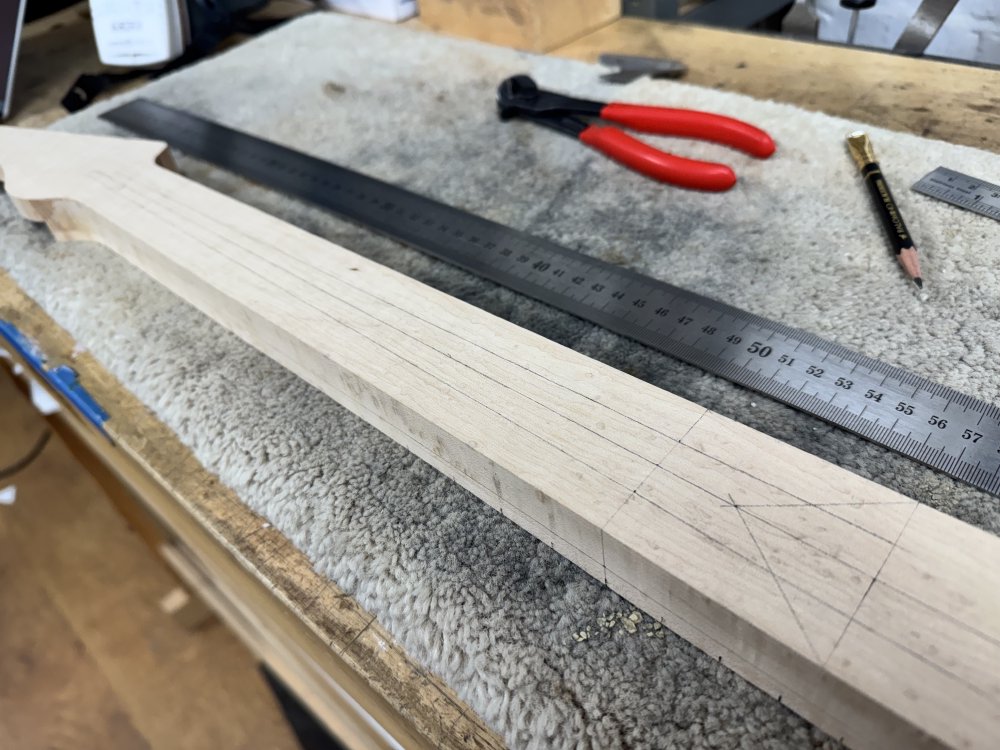
I said I’d explain what the lines mean this week, so I guess I’d better do that. I learned this technique early on my guitar building from this video by Fletcher Handcrafted Guitars, and I’ve used it with a little variation on every neck I’ve built.
The process is:
- Draw centreline down the length of the rear of the neck
- Mark 1st, and 12th frets on the
- On the 1st fret draw a mark 5mm either side of the centreline
- On the 12th fret draw a mark 10mm either side of the centreline
- On either side of the centreline draw a line the lenght of the neck that connects the marks you’ve made on the 1st and 12th fret - this gives you some tapering lines that you can see above.
- On either side of the neck draw a line along the length of the neck 2/3rd way up from the rear (which should be just below the fretboard glue line)
- On the rear again, mark headstock bounds - I do this by extending the sweep of either side of the headstock as it angles in towards the neck at around the start of the fretboard.
- Measure 85mm up from heel of neck on the rear centreline and draw a line across the width of the neck
- Measure another 35mm up the centreline and draw a triangle with that last line you drew (again you can see that in the above photo).
The triangle is where the carve of the neck stops before the neck joint with the guitar’s body. These days I normally don’t have a squared neck pocket like The Chuncaster has, but make it more curved for better ergonomics; for those guitars I don’t use that triangle method, but put the neck into the neck pocket, trace the sweep of the joint line, and then extend it 10 to 15 mm and that becomes my no-go area rather than the above triangle.
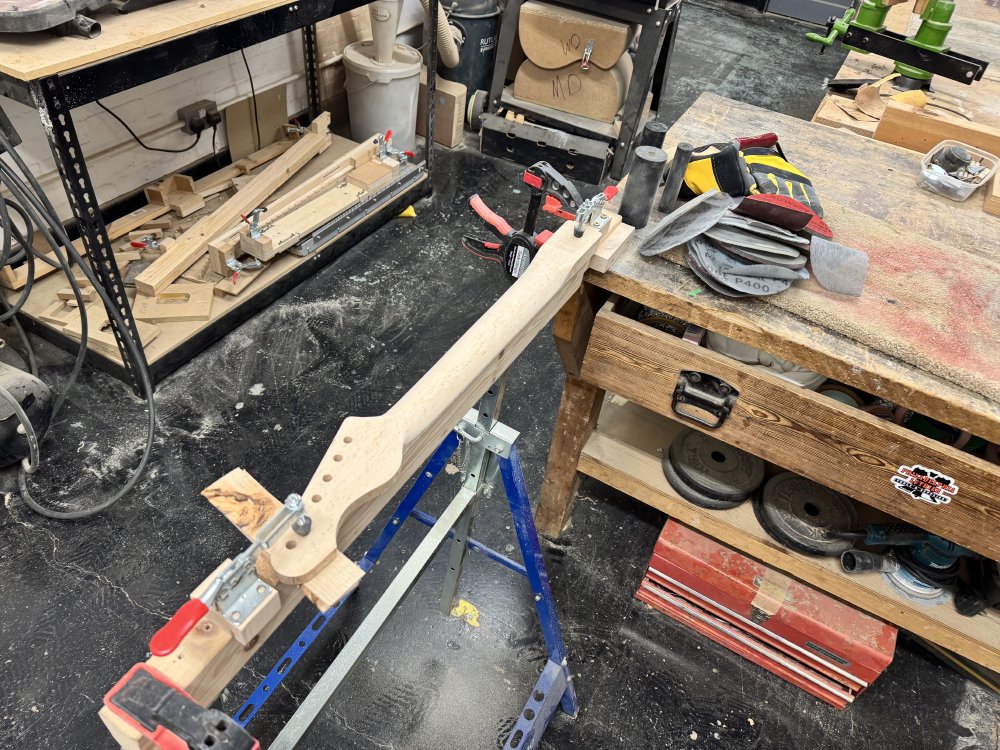
The line on the side and the tapered line on the back between the 1st fret and the triangle is where you’ll carve out to a facet using a rasp, which you can see in this photo of the neck after I’ve completed that stage:
Once that is done, you then carve at a more shallow angle to the centreline to have very rough curve here. You can control how chunky the finished neck feels by adjusting those 5mm and 10mm marks you make at the 1st and 12th fret - those values above give quite a skinny neck by the time you’re finished, and so I add a couple of mm to both if I want the neck to have a more baseball bat like chunky feel.
At this stage using the rasp I start to work the facets out into a more continuous rounded over shape. The one thing these marks don’t help you with is that the depth of the neck should taper also, with guitar necks being more narrow at the 1st fret than at the 12th etc. So at this stage I use callipers to start measuring the thickness of the neck, and get the values down to a reference neck I know I’m happy with, taking more off at the 1st fret end, then smoothing it out to the 12th fret, and using a ruler to check how well I’ve made the transition.
Then when I’m roughly happy I’ll use a band of fabric backed 80-grit sand paper pulled over the neck to start smoothing it out to a curve, before working up to finer grits to get a smooth finish.
All through this process from the moment I start rounding out the facets I’m regularly taking the neck off the stand and holding it like I was playing it and checking whether it feels right to me. Measurements in millimetres are an important guide, but in the end it’s all about whether it feels good in the hand that is the real measure of whether the carve is right or not. During the sanding stages I’ll also stop occasionally and check for rasp marks that still are showing and highlight those in pencil or chalk so I know where to focus my attention:

It’s a lot of work, and I usually end up splitting the process over two days, as the bulk removal wears me out to the point where I’ll not have the mental focus to do the finishing detail to a level I’d be satisfied with. But it is ultimately very satisfying that you can start with a few crude pencil lines, and end up with something so smooth and beautiful:
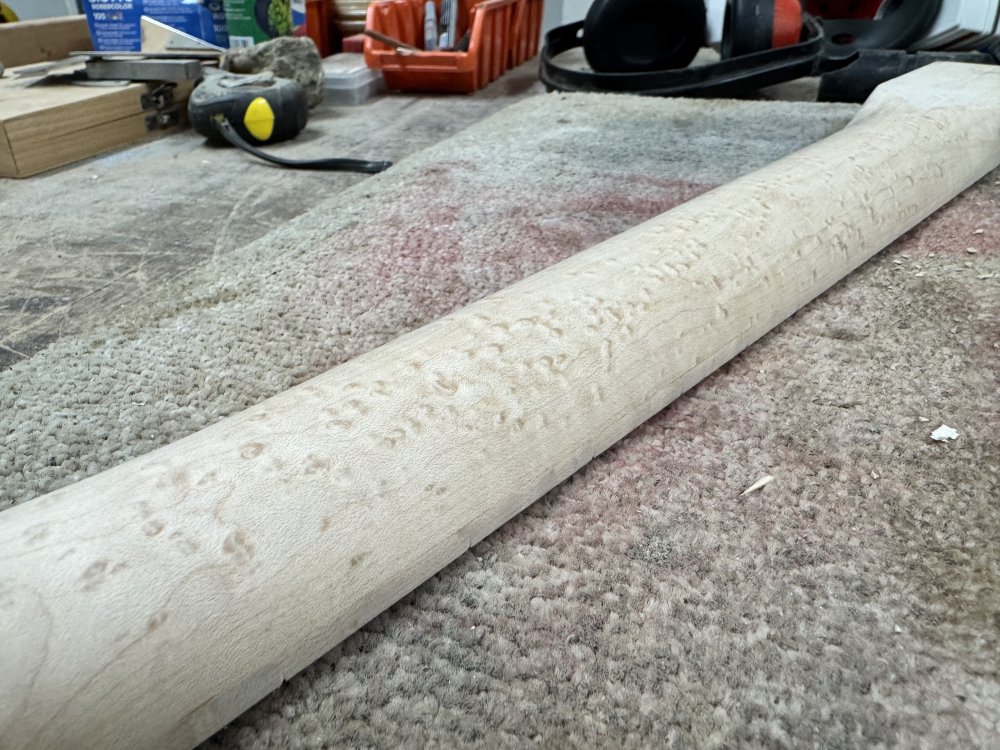
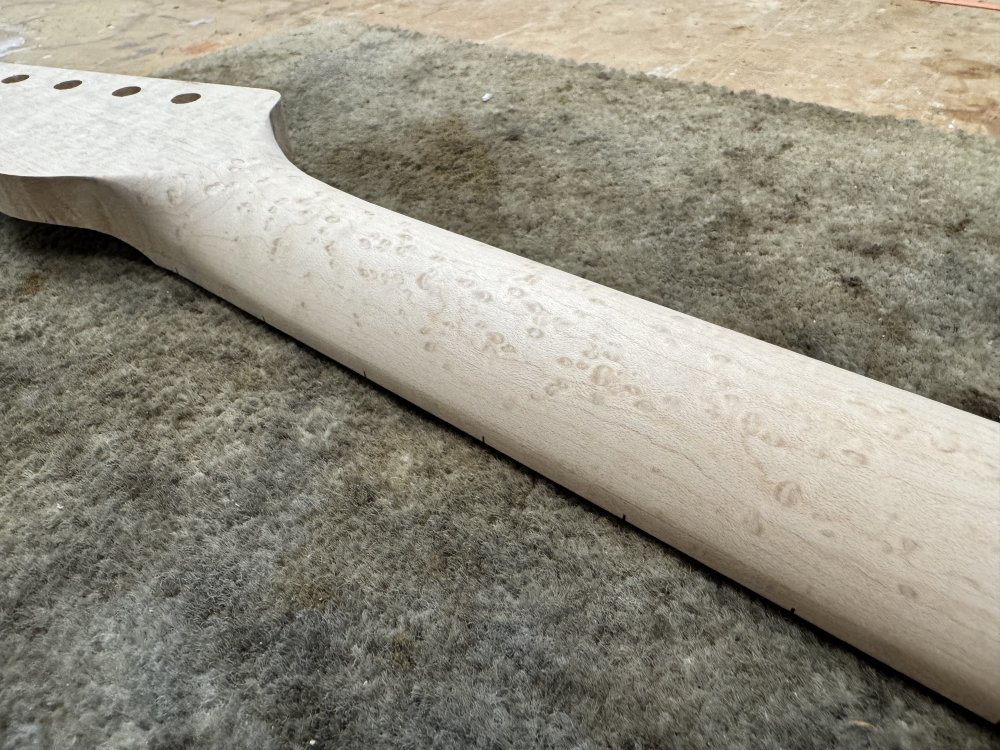
It helps that the birds-eye maple is also a beautiful material to work with - this neck is going to look amazing once oiled. That’ll do it for this week - next time we can cover the fretwork!