Some Time in the Shop
Published 8 Aug 2025
Tags: 3d printing, fretslots, jigs
Picking up a story of a neck build from a little while ago. This neck is actually a new neck for the second guitar I built, The Chuncaster. That build I made for my brother, and is the first guitar body I made myself rather than buying, but I still bought the neck, which is generally a strategy I recommend to first time guitar builders: you can make a lot of mistakes on the body and still have a great guitar at the end, but building a guitar neck is a lot less forgiving. That said, I started building necks not long after, and I’ve always wanted to go back and make one for my brother’s guitar; finally after all this time, that’s what I’m doing.
Resuming from gluing
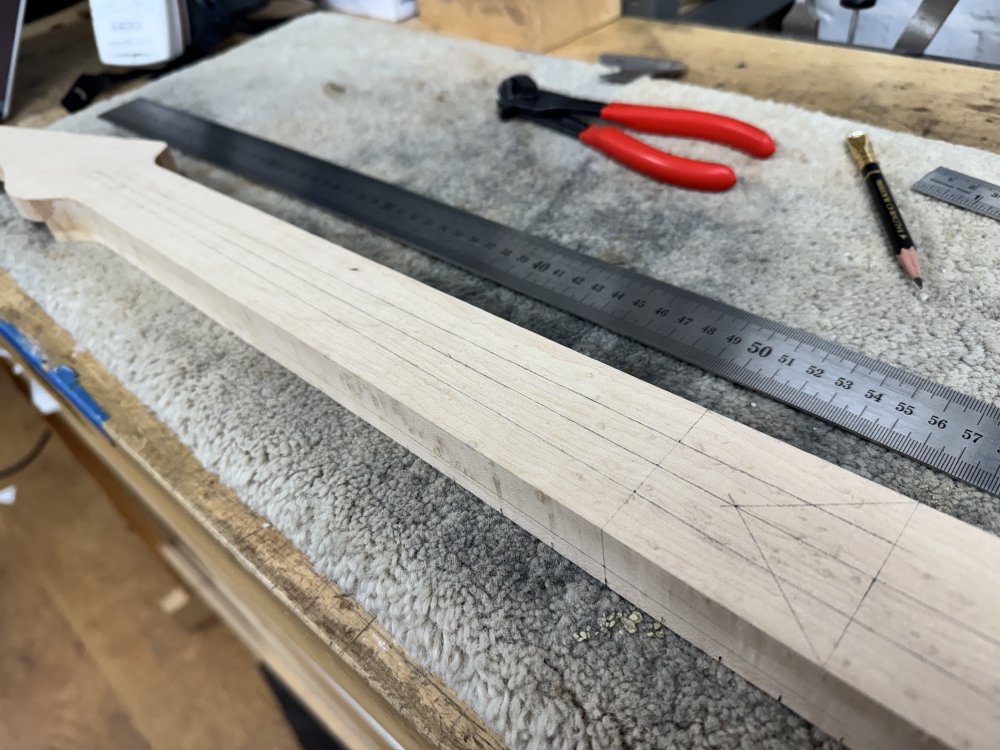
When I last posted about progress I’d been trying out my new technique of making jigs by 3D-printing them, building a device that helped with shaping the headstock on a guitar neck. The end result of that work was that I’d cut the profile of the neck into a single piece of maple and got the headstock level cut in, and we finished that post with me setting the fretboard being glued on:
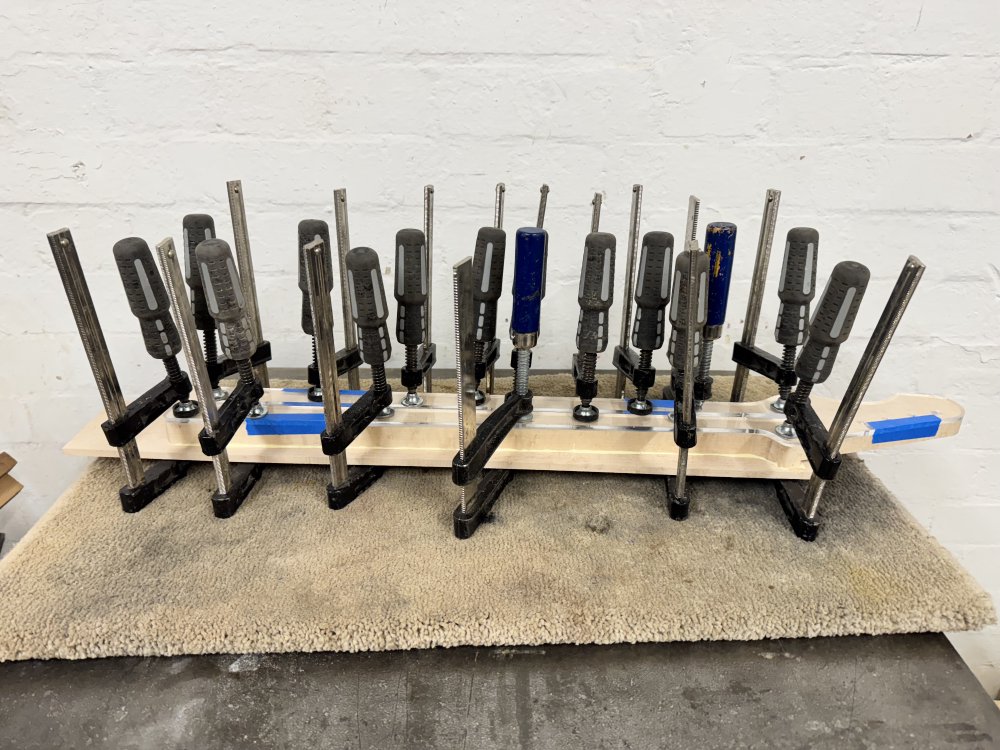
At this point I get nervous about whether I used enough glue and enough clamps to get a uniform seal all the way around the join. I’ve only once failed at this, but it still smarts a little to think about the wasted effort to get to that point of failure. Building a guitar neck is an exercise of investing more and more time into a piece and each next action could void all that and send you back to the start - another reason I tend to caution new builders away from starting with a neck unless they’re already seasoned woodworkers.
Thankfully with the clamps off, everything was looking good:
One thing I didn’t mention in my previous post was that for the first time since I started building guitars I was using a different brand of wood glue. When I started building guitars I bought a large bottle of gorilla wood glue, which has done me since. I picked this because it was what was used in the workshop at the community workshop I was in at the time, and it seemed to do the job. And indeed, has done so ever since. However, in my current workshop, which I share with two professional luthiers, both use Tightbond, which they both swear by, and so I’ve switched over. Partly, because if they are happy with it, then there is probably a reason, but mostly because it makes it easier in a shared space when people use the same things so if you run out half way through a job you can borrow from the others in a pinch.
I bring this up as I was asked by someone at Makefest this year about whether I used fancy glues or not, and the answer is no, and as low-brow as it might seam, I had nothing against gorilla glue and so if that’s what you’ve got to hand, go for it. I did note with the Tightbond it was a little less runny than Gorilla glue, which made it easier to apply and there was a little less sliding around of the fretboard as I tried to clamp if down, so where is a benefit to the switch. Tightbond I think dries quicker too, but given I tend not to have consecutive days in the workshop often, that’s less of a practical concern for me than my professional workshop-mates who are on the clock. So Tightbond does seem better, but you can totally use wood-glue you got from your local hardware store for this purpose if that’s what you have to hand.
I did chat to a long time builder of arch-top guitars, and he strongly advocated using fish-glue, as it was easier to heat treat to undo, so made repairs on older instruments easier: I guess this is the kind of insight you get after building for several decades - and might also have saved that failed neck I mentioned before, and I could have more easily delaminated the fretboard and tried again. So, there is better glue, but again, don’t let not having perfect stop you getting started.
Tidying up
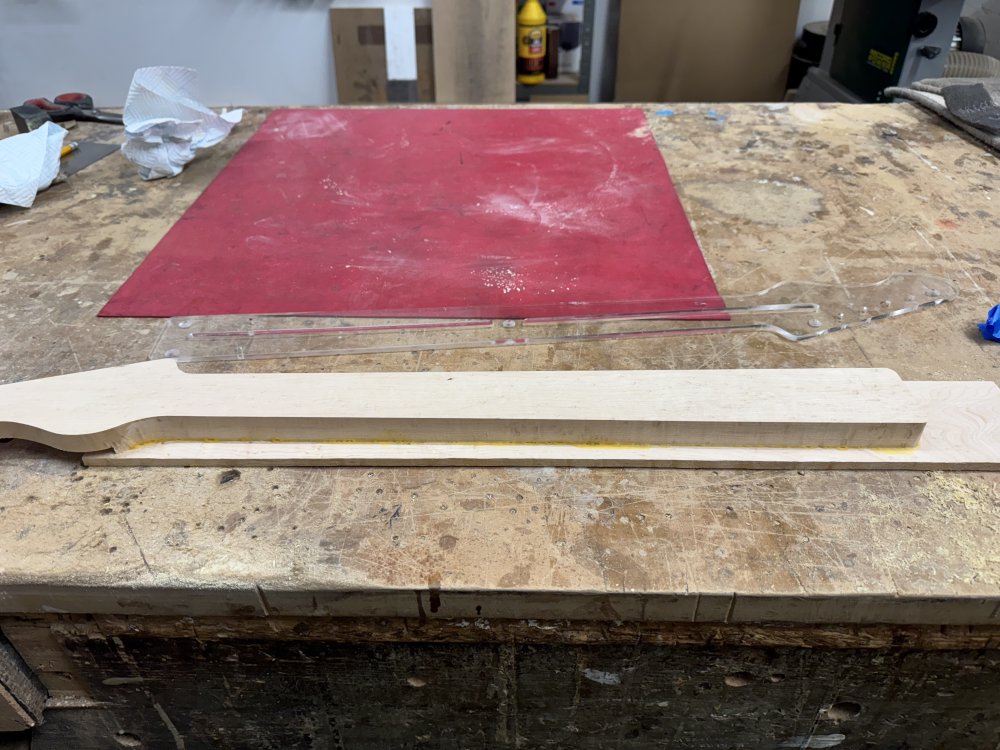
With the clamps off, the next step is to trim the fretboard to the profile of the neck. The first stop for this is the bandsaw to remove as much of it as possible, before then doing a finishing pass with a palm-router (a hand controlled router being a finishing tool, not a bulk-material removal tool).
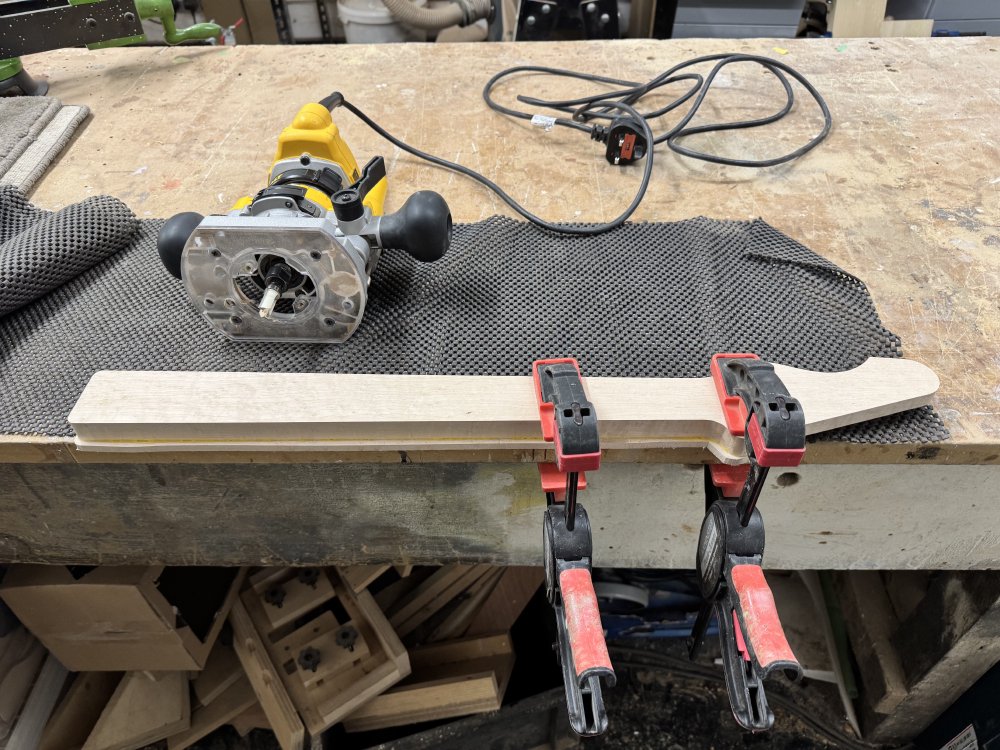
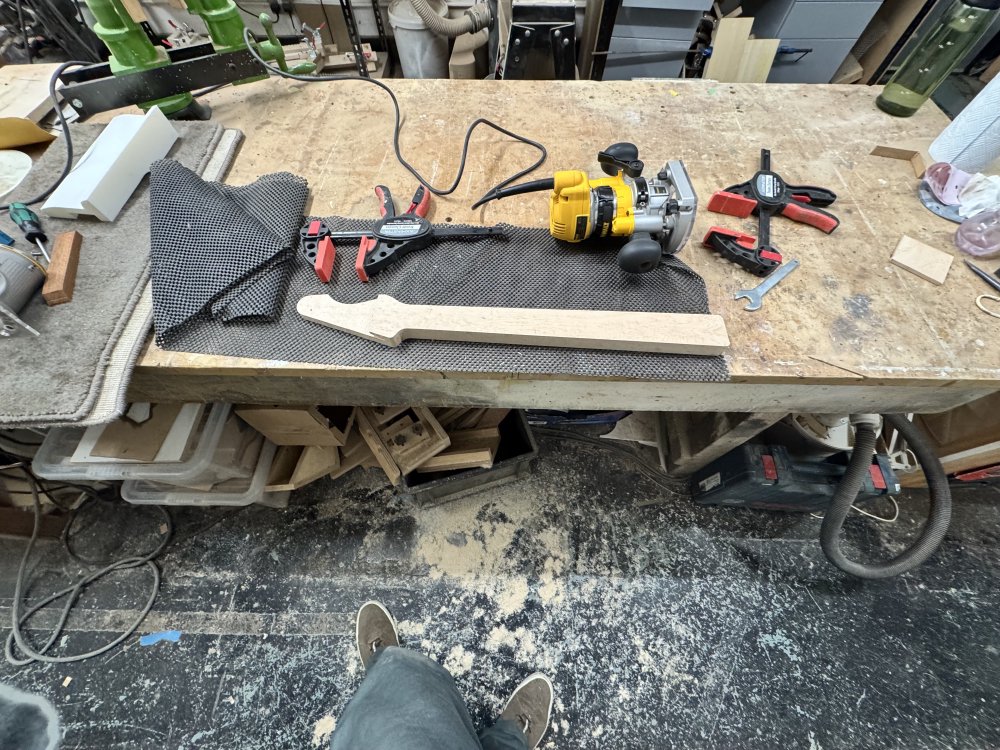
Even after getting rid of a lot of the material with the bandsaw, you still end up with an impressive amount of mess to clear up after routing, and why I still got into my overalls for a seemingly simple task!
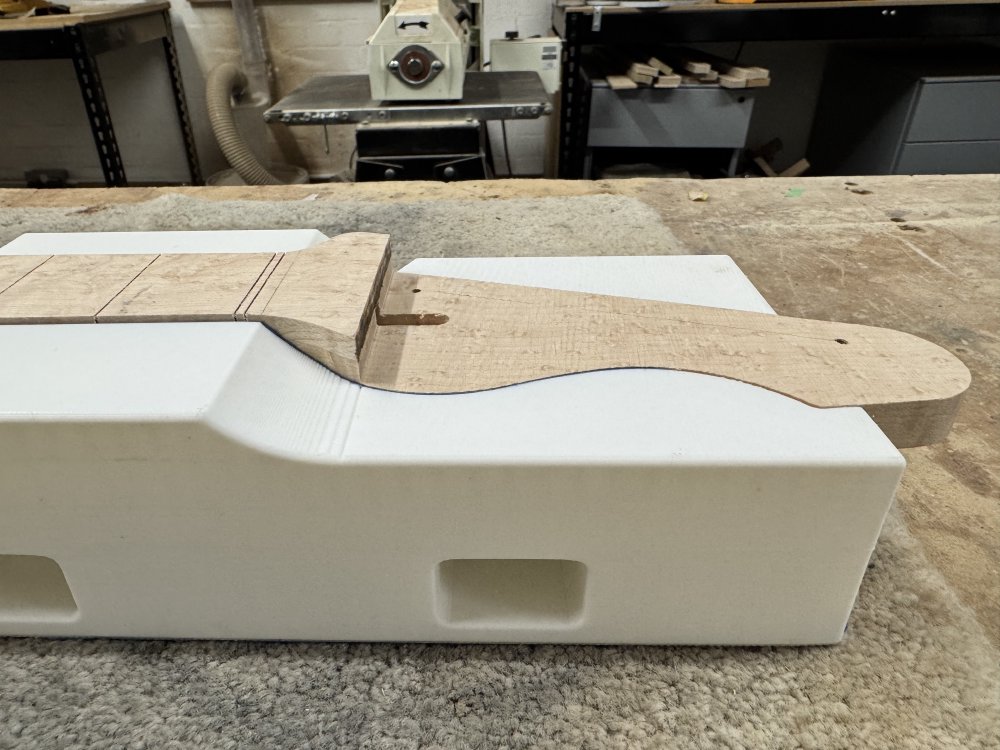
With the fretboard now flush on both the sides and the heel end, I still need to deal with the overhang at the headstock end, for which my 3D-printed jig makes a brief, penultimate, return:
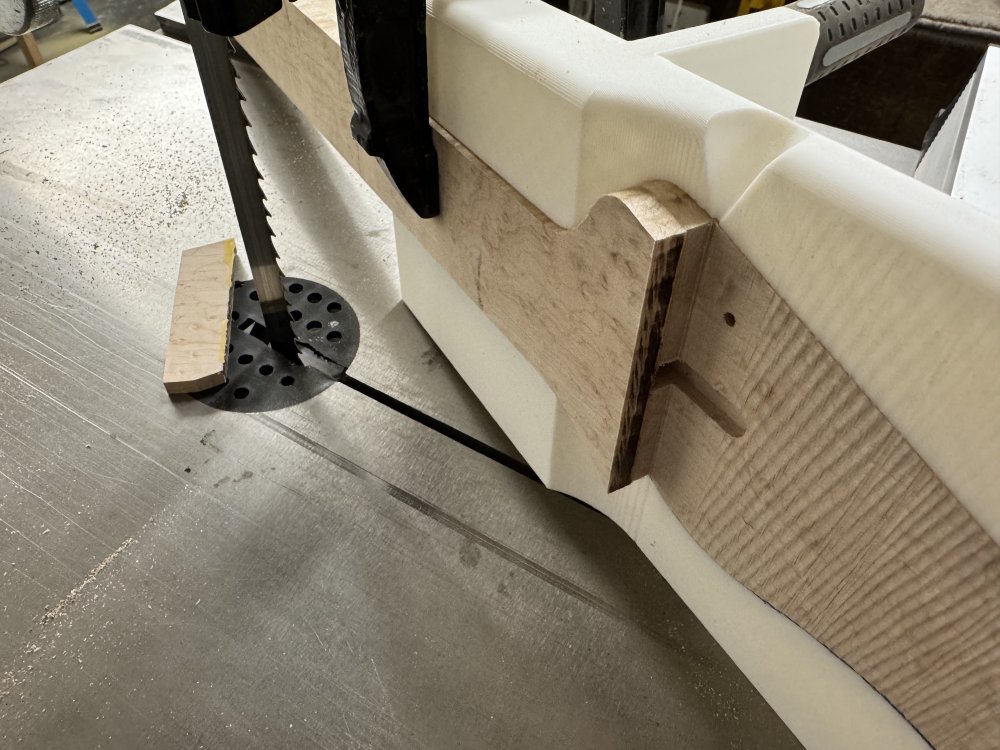
You can see I was going very slowly in my cut by the burn mark there - apologies to my past wood-shop mentors. Normally a burn mark like this is something to avoid, but in this case that material will be removed when I round over the headstock later, and for me the greater risk that I was trying to avoid was pushing through the wood, coming out the other side of the overhang, and then hitting air: I was worried if this happened the piece might slip and I’d end up cutting into the rest of the neck, which would be bad. Thus I took it slowly and cautiously, but with a bandsaw that does lead to friction burns like this.
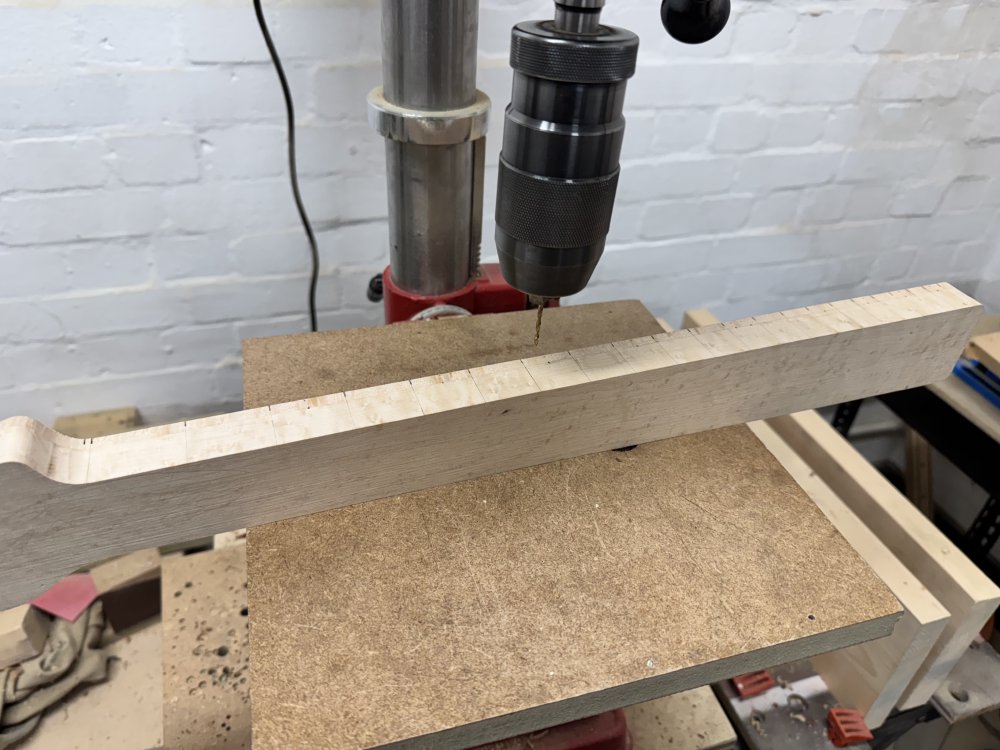
Fretting, part one: cutting the slots
As I mentioned in the previous post on Makefest, as it was the tenth anniversary I’ve been reflecting a lot about how far I’ve come in that time. When I made my first necks I needed a way to mark out the position of the frets so I could cut them, and being as I was based in a makerspace, I came up with my own way do doing that using a laser-cutter. Using the laser-cutter had the added benefit that I could do more than just mark the position, I could etch it enough that my fret-saw could find its groove, literally. I’m still quite proud of that maker hack, but these days I reap the benefits of being in a shared-workshop with professional luthiers show don’t have time to hand-saw each slot, and have come up with their own way to speed up the process using a table-saw:

You can see the neck is stuck (using double sided sticky tape) onto a metal plate with a series of notches on it, and these notches will let me align the neck up with a pin on the sled that you see on the table saw in just the right position for each fret. We have a different metal template for each of the common scale-lengths guitars come in. And with this what was a very careful hour of saw cutting (as saws like to jump out of grooves), is just a few (still careful) minutes with a table saw:
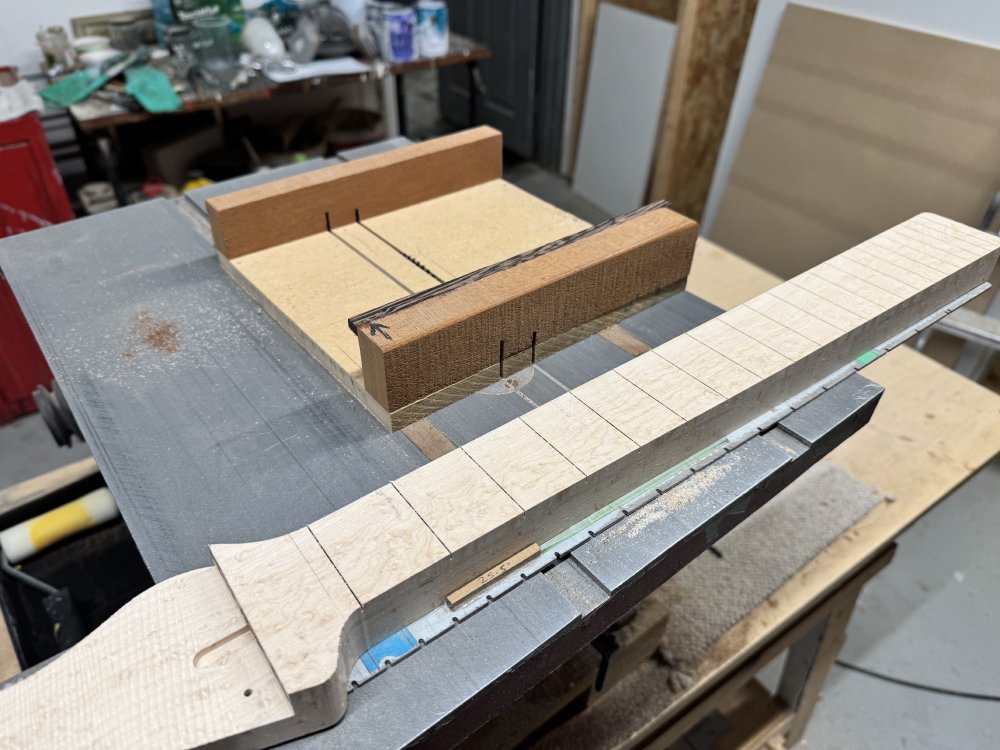
Again, as with the glue, do you need this to make a guitar? Absolutely not: a ruler, a pencil, and a saw will do the job perfectly fine, just it’ll be slower and a little more stressful perhaps. But at the same time I do feel this is one of the better luxuries I have access to in my current workshop :) The one downside of this otherwise wonderful setup is that the templates don’t include a notch for the other side of the nut slot, which means I need to shimmy the template along a few mm and hope I aligned it correctly before I cut that.
Inlays
With the slots cut, I can now mark out the position of the fret inlays. For those readers that don’t play guitar (of which I know there are some) the inlays that can be seen on the face of a guitar neck and, somewhat less obviously, on the side of the neck, are there to help the player work out where they are on the neck. The double dots on teh 12th fret tell you you’re one octave up, the dot on the 5th fret tells you that’s where A is on the low string (in standard tuning), and so forth.
I have to confess that I’ve stopped doing dot inlays on the face of the fretboard, as I prefer the uncluttered look that shows the wood more, but I’d be remiss if I didn’t point out that this aesthetic choice also means I reap the benefits in not having to drill recesses for them and glue them in. But what I can’t skip is having the side dots on the neck, as those are the ones that are more obvious to the player.
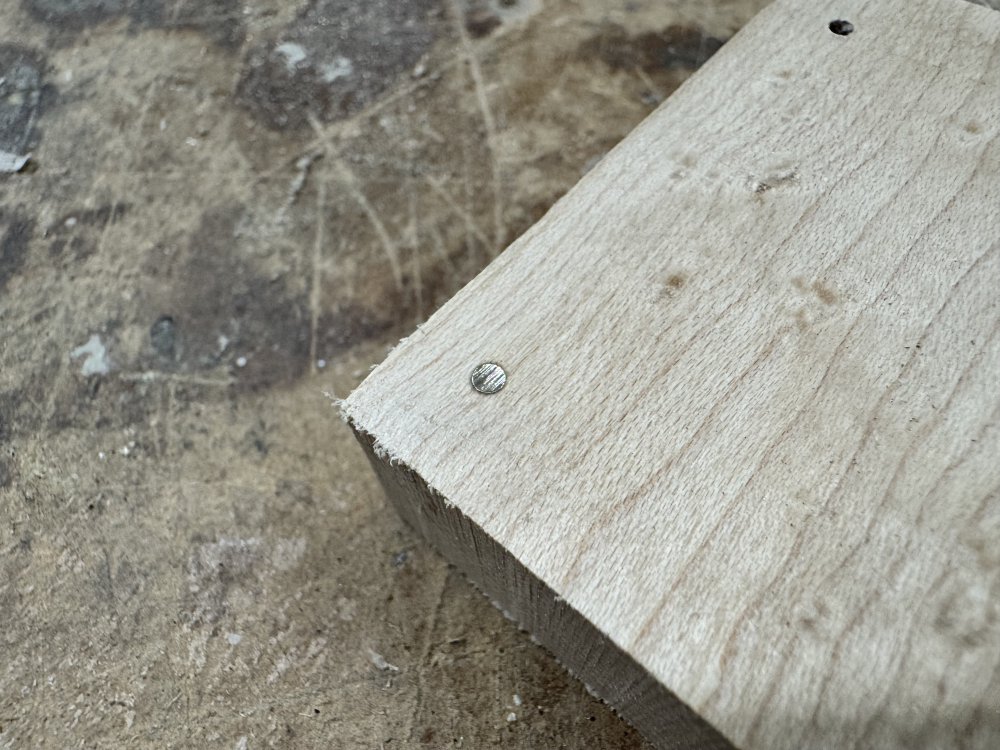
For this new neck for the Chuncaster I decided to follow on the trend I started with Hästen, and do metal inlays on the side. For Hästen I’d used a silverish metal, but Chuncaster is somewhat notable for having all gold hardware, and so I had to use a goldish metal for these ones. Having never used this specific material before, I did as ever and tested it on some scrap before using it on the actual workpiece:
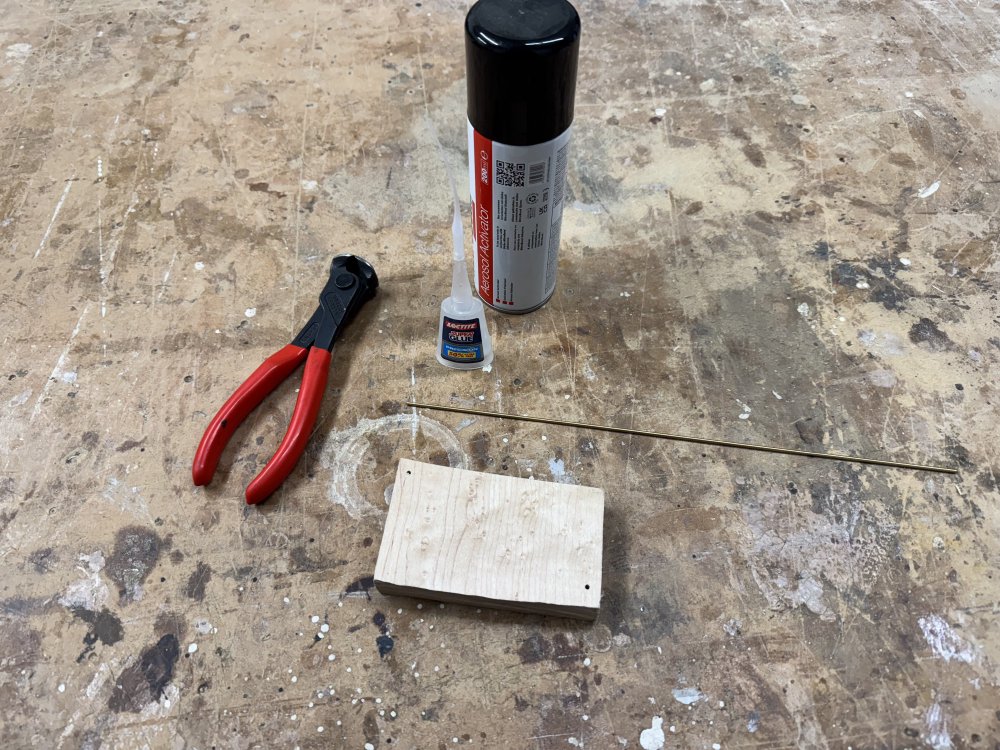
There’s two things I primarily testing for here: what’s the right drill size I need to use to get the closest fit to the dowel (otherwise you can end up with obvious glue lines), and also how hard is this metal when it comes to sanding down. With the silverish one on Hästen it was quite tough, so I had to be careful not to over-sand the wood around it whilst levelling the metal part. Thankfully this one seemed no worse and having used it once I found levelling it worked fine so long as I took care.
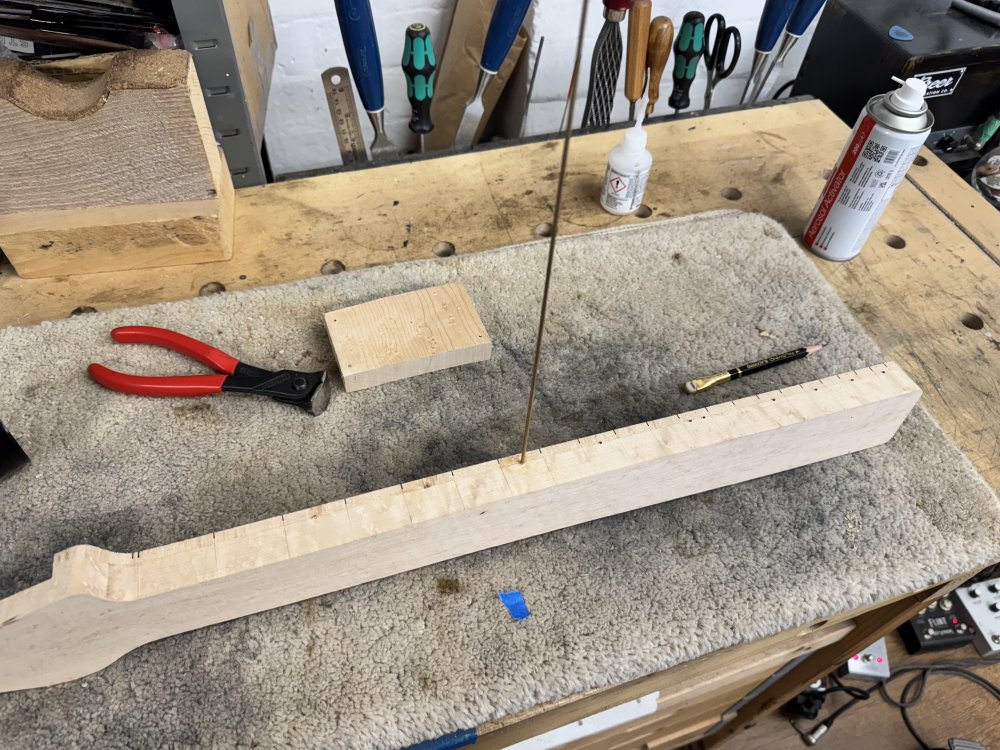
With that testing concluded satisfactorily, I could set to drilling the inlay holes:
You can see that I’m installing the inlays on the seam between the fretboard and the main body of the neck, which is the most common way to do, but actually not what I meant to do :) Following the seam has two advantages: you know that your inlays are in a line, and you know that despite not having rounded over the fretboard yet that you’re not too close to where the eventual edge of the fretboard will be. The downside though is it’s really really obvious if you don’t drill perfectly on the line, and being wood, nothing is infinitely perfect, as drill bits lite to follow the grain and so forth. Thus on the last batch of guitars I’d take to putting the inlay into just the fretboard itself: it means a bunch more measuring and marking, but means you can have some tiny amounts of variance in the hole position without it being so obvious. But I forgot, and just went with how I have done it on most my builds out of habit - doh! Thankfully this hadn’t be specified by the recipient of this guitar, so no problem here other than I feel a bit silly that I changed my technique.
With the holes drilled, I can now insert the dowel, using a little superglue to secure it, and some superglue-activator to stop me sticking myself to the workpiece:
And the end result:
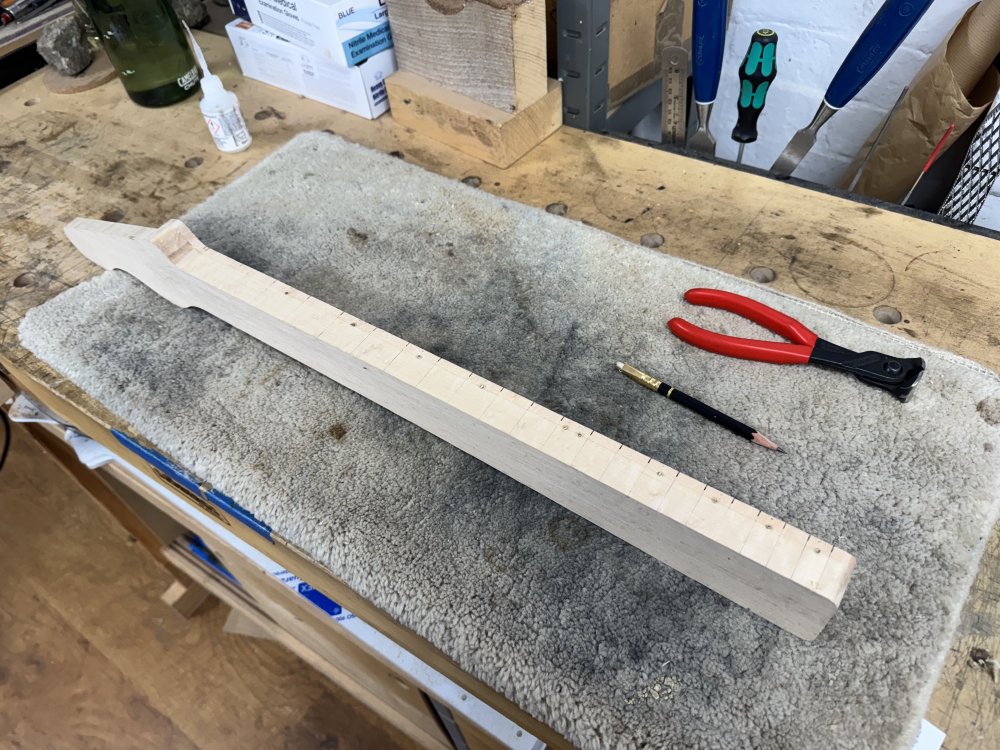
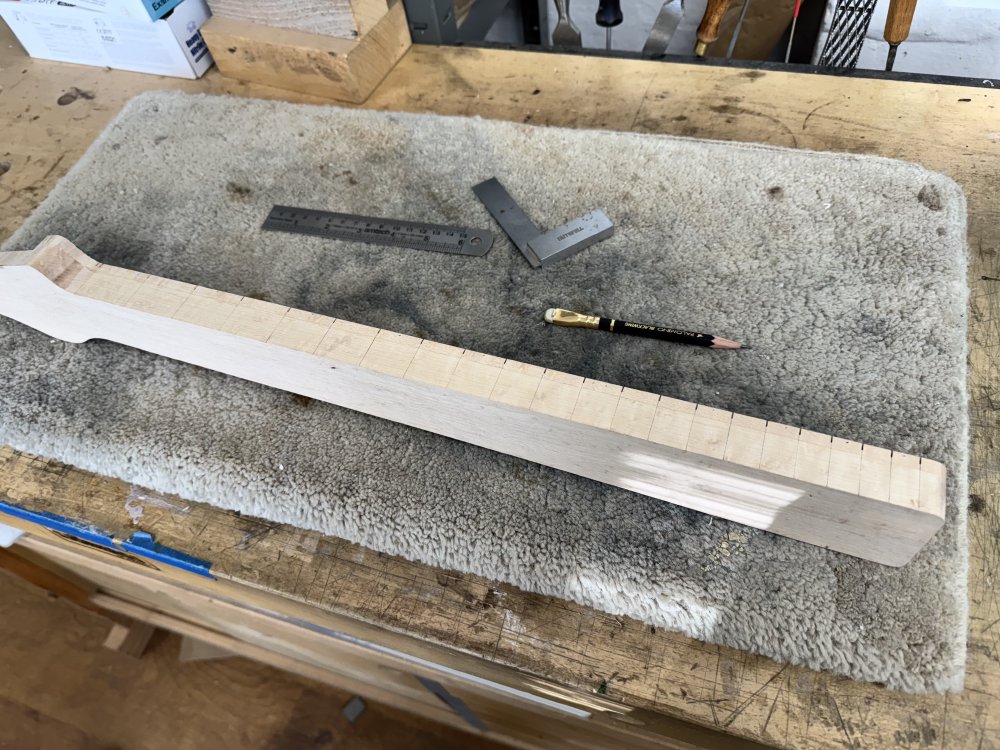
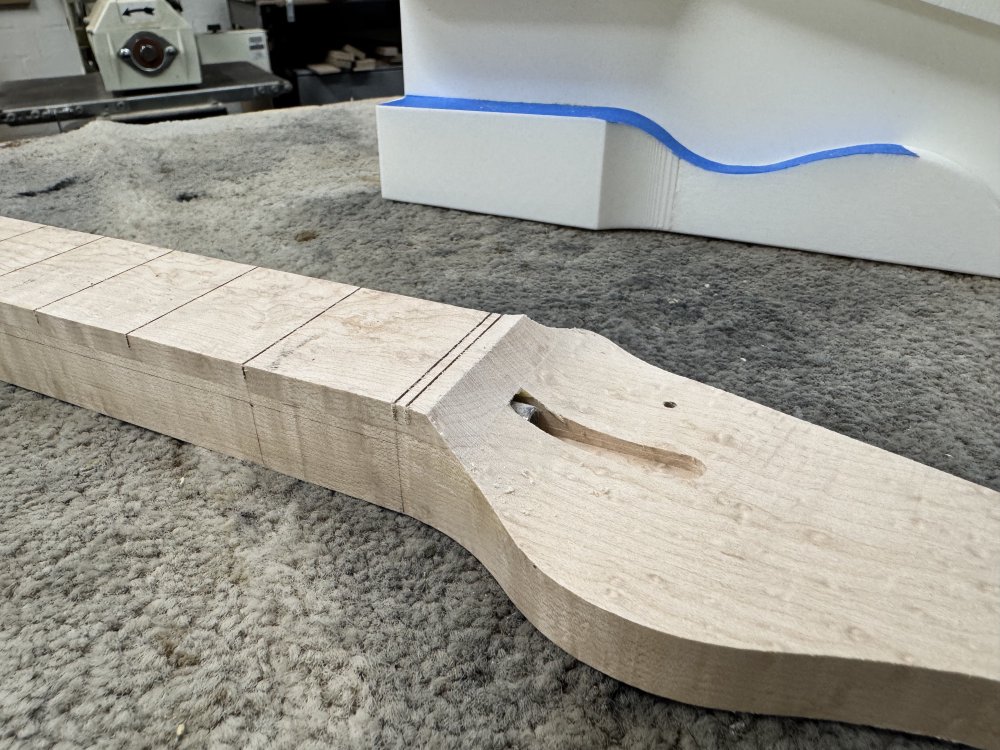
At this stage I lightly filed down the faces of the dowels so they weren’t sticking out too much, but I didn’t go all the way, as the entire neck will be sanded somewhat agressively when I do the carving of the neck, and so I’ll let that job serve the purpose of getting the inlays flush. On the topic of carving, whilst I have the neck on the bench with a pencil and ruler to hand, now is also the time to mark up the guide lines for where I’ll need to carve the neck:
I’ll cover what these marks signify in the next post when I do the actual carving.
The final act of the 3D-printed jig
The last job for this trip to the workshop was also the final task for which the 3D-printed jig had been designed: assisting in rounding over the headstock transition:
The jig is doing two things for me here: firstly, it’s providing a guide for how much material to remove, and secondly it’s providing a flat surface I can put on the table of the spindle-sander that is parallel to the neck’s centre-line (because the sides of a guitar neck are tapered, so can’t be used for that).
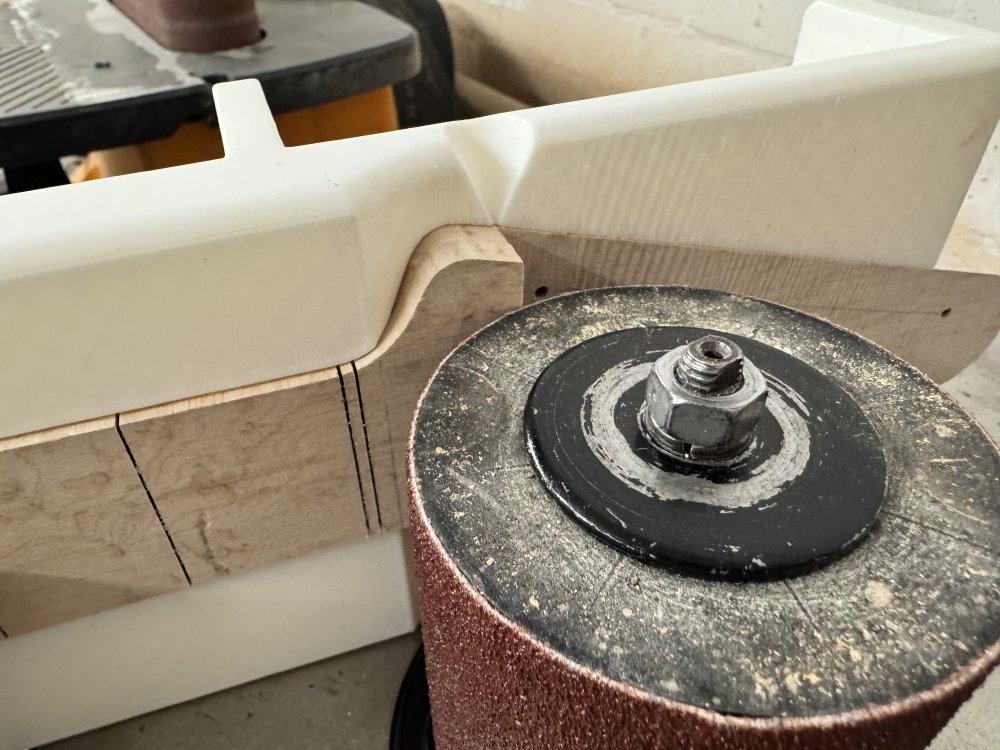
A few minutes of sanding later, and I have a perfect transition sanded in, in what has to be the most hassle-free that job has ever gone.
I’m very pleased with this 3D-printed jig that serves so many different parts of the neck build in one single print. Now I’ve done this once, I know that I’ll be doing more of this, particularly for the next Älgen style build, where I struggled with several build stages due to the angles involved.
That’s it for this update, but more soon on the progress on this neck and some new designs I’m working on!